
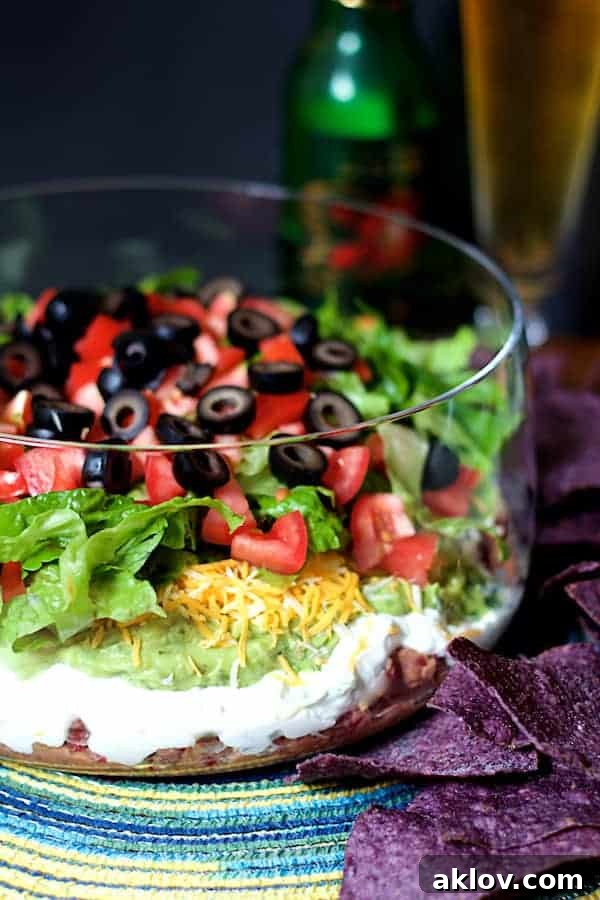
Transform your next party or game day gathering with our incredible recipe for a Healthier 7-Layer Dip! This timeless classic receives a refreshing makeover, elevating its flavors and nutritional profile through simple, thoughtful adjustments. Forget the guilt often associated with indulgent party foods; this vibrant, layered dip is packed with fresh, wholesome ingredients that deliver on both taste and health. It’s a dish that promises to be a crowd-pleaser, proving that healthier choices can be utterly delicious and irresistibly satisfying.
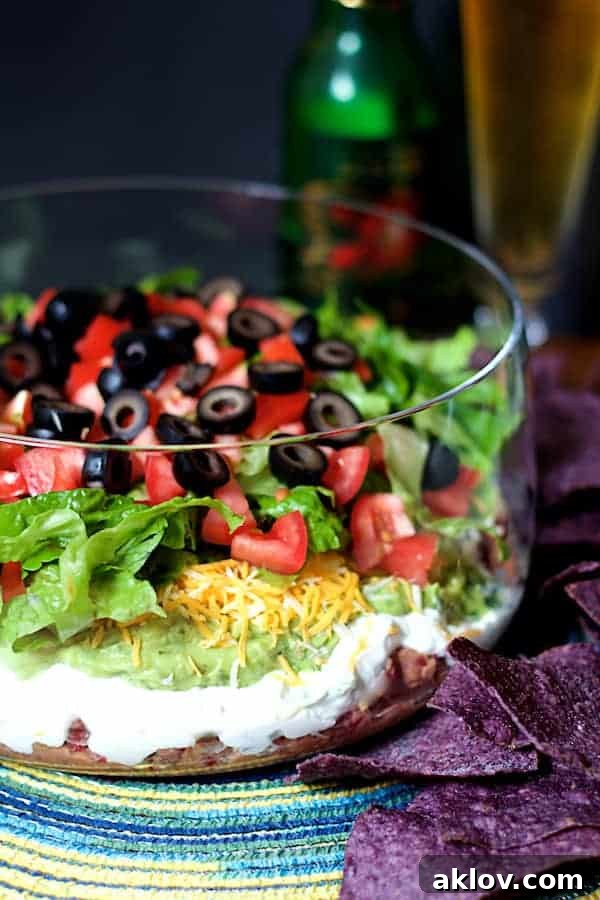
For too long, the beloved 7-Layer Dip has been synonymous with convenience products – canned refried beans, packaged taco seasonings, and pre-made guacamole. While these options offer speed, they often come laden with excessive salt, artificial additives, and a distinct processed flavor that can overshadow the potential of this dish. My journey to create a healthier version began with a simple philosophy: embrace fresh ingredients and make everything from scratch whenever possible. The result is a dip that not only tastes superior but also offers a lighter, more wholesome alternative, allowing you to enjoy every scoop without compromise.
This reinvented 7-Layer Dip is bursting with the vibrant flavors and textures of truly fresh ingredients. From the homemade refried beans (crafted from a humble can of kidney beans) to the zesty, chunky guacamole, each layer is carefully prepared to maximize taste and nutritional value. You’ll be amazed at how a few thoughtful swaps can transform a classic into something truly spectacular. Prepare to delight your guests at game day festivities, backyard barbecues, or any celebratory occasion with a dip that’s as good for you as it is delicious.
Crafting the Ultimate Healthier 7-Layer Dip: A Step-by-Step Guide
Creating this healthier dip is an enjoyable process, and the beauty lies in building each layer with fresh components. Here’s how to assemble your masterpiece, ensuring every scoop is a burst of balanced flavor and texture:
-
Layer #1: The Flavorful Foundation – Homemade Refried Beans
We kick off our healthier dip with a robust and savory base of homemade refried beans. While convenience cans might be tempting, making your own is surprisingly easy and allows for complete control over ingredients and sodium levels. Start with two cans of reduced-sodium red kidney beans. The “reduced-sodium” aspect is crucial, as it empowers you to season the beans precisely to your liking without worrying about excessive salt from the start. Drain and rinse the beans thoroughly to remove any excess starch and residual sodium. In a skillet, heat a small amount of olive oil over medium-high heat. Add the rinsed beans and sauté briefly for 2-3 minutes; this helps to tenderize them and allows them to absorb the subsequent flavors more effectively. Stir in salsa, aromatic ground cumin, finely minced garlic, and season generously with salt and freshly ground black pepper to taste. Remove from heat and, using a potato masher, mash the beans to your desired consistency – some prefer a smoother texture, while others enjoy a chunkier, more rustic feel. Allow the beans to cool slightly before spreading them evenly as the first layer in a large glass serving bowl. For an alternative, my Smokin’ Chipotle Black Bean Dip also makes an excellent, flavorful base.
-
Layer #2: The Creamy & Zesty Core
Next, we introduce a cool, tangy layer that perfectly complements the savory beans. In a small bowl, combine light sour cream or, for an even lighter option, use plain low-fat Greek yogurt. The yogurt adds a wonderful tang and extra protein. Fold in finely minced scallions (green onions) and a vibrant, finely chopped fresh jalapeno pepper. The scallions provide a mild oniony bite, while the jalapeño adds a touch of fresh heat and bright green color. Mix these ingredients thoroughly until well combined, then carefully spread this creamy mixture over the cooled bean layer, creating a smooth and even second tier.
-
Layer #3: Fresh & Chunky Guacamole
No 7-Layer Dip is complete without a rich layer of guacamole, and making it fresh is non-negotiable for superior flavor and texture. In a food processor or blender, combine two ripe, pitted avocados, a squeeze of fresh lemon juice (essential for preventing browning and adding a bright acidity), one minced scallion, fresh chopped cilantro, a dash of your favorite hot sauce for an extra kick, and season with salt and freshly ground black pepper. Pulse the mixture until it’s blended but still wonderfully chunky. We purposefully avoid over-processing it to retain a desirable texture that adds interest to the dip. Carefully spread this luscious guacamole over the sour cream layer. If you’re looking for a specific flavor profile, my Spicy Guacamole recipe can also be used here for an extra kick.
-
Remaining Layers: Crisp, Crunchy, and Colorful Toppings
The final four layers add bursts of color, crunch, and classic Tex-Mex appeal:
- Layer #4: Reduced-Fat Cheese: Sprinkle a generous amount of shredded 2% Mexican blend cheese over the guacamole. Opting for reduced-fat cheese still provides that essential cheesy goodness while cutting down on saturated fat.
- Layer #5: Fresh Lettuce: Next, add a vibrant layer of shredded Romaine lettuce. Its crisp texture and refreshing taste provide a perfect contrast to the creamier layers below. You’ll want a generous 2 to 3 cups for a substantial green layer.
- Layer #6: Juicy Tomatoes: Scatter finely chopped plum tomatoes over the lettuce. Their bright acidity and juiciness add another layer of freshness and color.
- Layer #7: Sliced Black Olives: Finish your dip with a scattering of sliced black olives. One can (4-ounce) of drained sliced black olives provides a salty, briny finish and a classic visual touch.
Once assembled, this beautiful dip is ready to shine! Serve it alongside baked tortilla chips or whole-grain tortilla chips for an even healthier crunch that complements the fresh ingredients perfectly. These simple serving companions ensure your guests can scoop up every delicious layer. You can also pair it with an assortment of fresh vegetable sticks like carrot and celery, or even bell pepper slices, for a gluten-free and lower-carb option.
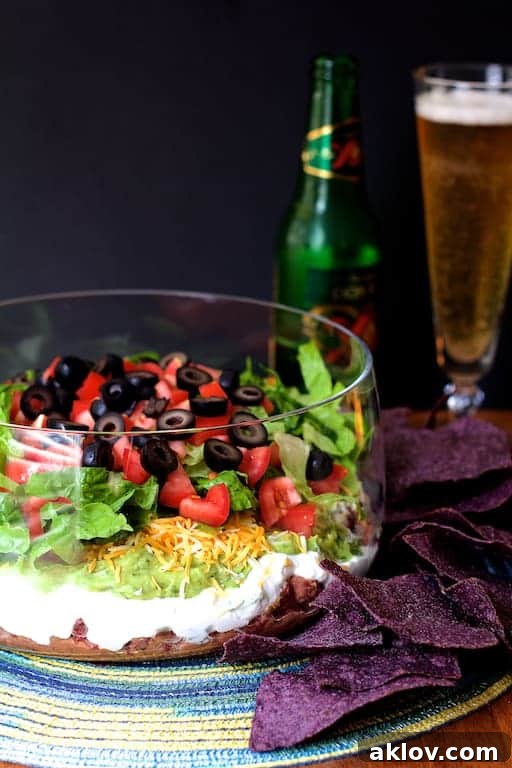
Why Choose a Healthier 7-Layer Dip? The Benefits of Freshness
The allure of a 7-Layer Dip is undeniable, but traditional versions often come with a hidden cost: excessive sodium, unhealthy fats, and a long list of artificial ingredients found in processed components. Our healthier rendition addresses these concerns head-on, offering numerous benefits:
- Reduced Sodium: By using reduced-sodium canned beans and making our own seasonings, we significantly cut down on the sodium content. This is beneficial for heart health and allows the natural flavors of the ingredients to shine.
- Fewer Additives and Preservatives: Homemade components mean you control what goes into your dip. Say goodbye to artificial flavors, colors, and preservatives often found in store-bought mixes and pre-made dips.
- Increased Freshness and Flavor: There’s simply no comparison to the taste of fresh ingredients. Ripe avocados, crisp lettuce, juicy tomatoes, and vibrant cilantro deliver a superior flavor profile that tastes brighter and more authentic.
- Better Nutritional Profile: Swapping full-fat sour cream for light sour cream or low-fat Greek yogurt reduces saturated fat and adds protein. Fresh vegetables contribute vitamins, minerals, and fiber, making this dip a more nutrient-dense option.
- Customization: Making it from scratch gives you the freedom to customize. Adjust the spice level with more or less jalapeño and hot sauce, or add extra veggies like corn or bell peppers.
Serving and Variation Tips for Your Healthier 7-Layer Dip
This dip is incredibly versatile and can be adapted to various tastes and dietary needs. Here are some ideas to make it truly your own:
- Spice it Up: For those who love heat, consider adding a pinch of cayenne pepper to the bean layer or incorporating a spicier salsa. A dash of red pepper flakes in the guacamole also works wonders.
- Vegan/Dairy-Free Options: Easily convert this to a vegan dip by substituting dairy sour cream with a plant-based sour cream or unsweetened dairy-free yogurt. Ensure your cheese is also plant-based, or omit it entirely for a naturally delicious dip.
- Add More Veggies: Boost the nutritional content and crunch by adding finely diced bell peppers, corn kernels, or thinly sliced radishes to the top layers.
- Presentation Matters: While a clear glass bowl showcases the beautiful layers, you can also assemble this dip in a large shallow dish. Garnish with extra cilantro sprigs or a sprinkle of paprika for an appealing finish.
- Beyond Chips: While tortilla chips are classic, this dip also pairs wonderfully with crunchy pita bread, celery and carrot sticks, cucumber slices, or even作为墨西哥玉米饼、卷饼或沙拉的美味馅料。
More Great, Easy Appetizer Recipes to Explore
If you loved this healthier dip, you’ll surely enjoy these other fantastic and easy-to-make appetizers perfect for any occasion:
- Deviled Crab-Stuffed Artichoke Bottoms
- Shrimp Cocktail Louis
- Lemon Parmesan Stuffed Artichoke Bottoms
- Cream Cheese Salsa Dip
- Crab Mango and Avocado Salad with Chile-Lime Dressing in Endive
- Chicken, Spinach and Artichoke Puff Pastry Parcels
- Goat Cheese Stuffed Artichoke Bottoms
- Spinach Artichoke Squares
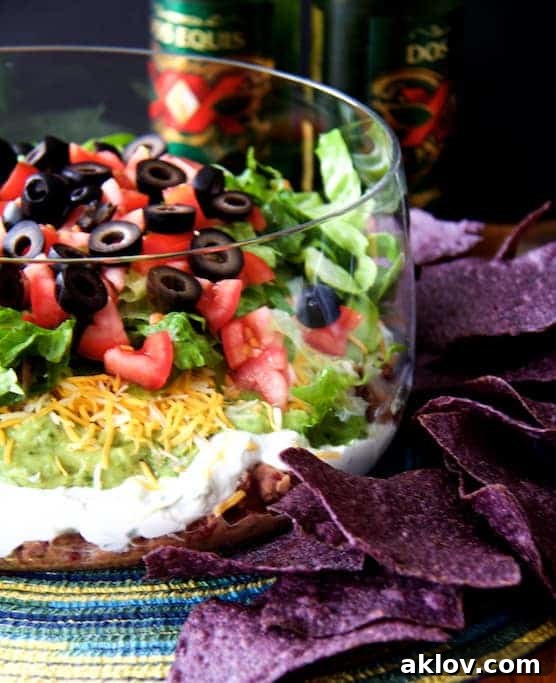
7-Layer Dip
By Carol | From A Chef’s Kitchen
This Healthier 7-Layer Dip has lots of fresher and lighter ingredients! You’re going to love serving it at your game day gathering–or any gathering.
Prep Time: 45 mins
Cook Time: 5 mins
Total Time: 50 mins
Servings: 8
Equipment
- Nonstick Skillet
- Potato Masher
- Wusthof Chef Knife
- Cutting Board
- Glass Mixing Bowls
- 13 x 9 Glass Baking Dish
Ingredients
First Layer
- 1 tablespoon olive oil
- 2 cans (15-ounce) red kidney beans, drained and rinsed
- 1/2 cup salsa
- 2 teaspoons ground cumin
- 2 cloves garlic, minced
- Salt and freshly ground black pepper, to taste
Second Layer
- 1 1/2 cups light sour cream, or low-fat yogurt
- 3 scallions, minced
- 1 jalapeno pepper, minced
Third Layer
- 2 avocados, pitted
- 1 tablespoon lemon juice
- 1 scallion, minced
- 2 tablespoons chopped cilantro
- Hot sauce, to taste
- Salt and freshly ground black pepper, to taste
Fourth Layer
- 1 1/2 cups shredded 2% Mexican blend cheese
Fifth Layer
- 2 to 3 cups shredded Romaine lettuce
Sixth Layer
- 2 plum tomatoes, chopped
Seventh Layer
- 1 can (4-ounce) sliced black olives, drained
Instructions
First Layer
- Heat olive oil over medium-high heat in a skillet or sauté pan. Add the beans and sauté 2 to 3 minutes. Add the salsa, cumin, garlic, and salt and black pepper. Remove from heat. Using a potato masher, mash the beans. Let cool then place in the bottom of a large glass bowl.
Second Layer
- Combine sour cream or yogurt, scallion, and jalapeno in a bowl and mix well. Carefully layer over the bean layer.
Third Layer
- Combine avocado, lemon juice, scallion, cilantro, and salt and black pepper in a food processor or blender. Pulse to combine, leaving a bit chunky. Carefully spread over the sour cream layer.
Fourth Layer
- Add the cheese.
Fifth Layer
- Top with shredded lettuce.
Sixth Layer
- Top with chopped tomato.
Seventh Layer
- Top with sliced black olives.
Notes
MAKE AHEAD:
- Can be assembled up to the shredded lettuce layer 1 day ahead of time. Cover and refrigerate.
- When ready to serve, add the lettuce, tomato, and black olives for optimal freshness.
Nutrition Facts (per serving)
- Serving:
- 1
- Calories:
- 230 kcal
- Carbohydrates:
- 11 g
- Protein:
- 9 g
- Fat:
- 18 g
- Saturated Fat:
- 7 g
- Polyunsaturated Fat:
- 2 g
- Monounsaturated Fat:
- 9 g
- Cholesterol:
- 28 mg
- Sodium:
- 317 mg
- Potassium:
- 503 mg
- Fiber:
- 4 g
- Sugar:
- 2 g
- Vitamin A:
- 1661 IU
- Vitamin C:
- 13 mg
- Calcium:
- 329 mg
- Iron:
- 1 mg
Nutritional values are automatically calculated using unbranded products and are estimates only. Actual results may vary based on ingredients used and portion sizes. Adjust as needed for dietary restrictions, allergies, or health concerns.
Like this? Leave a comment below!