
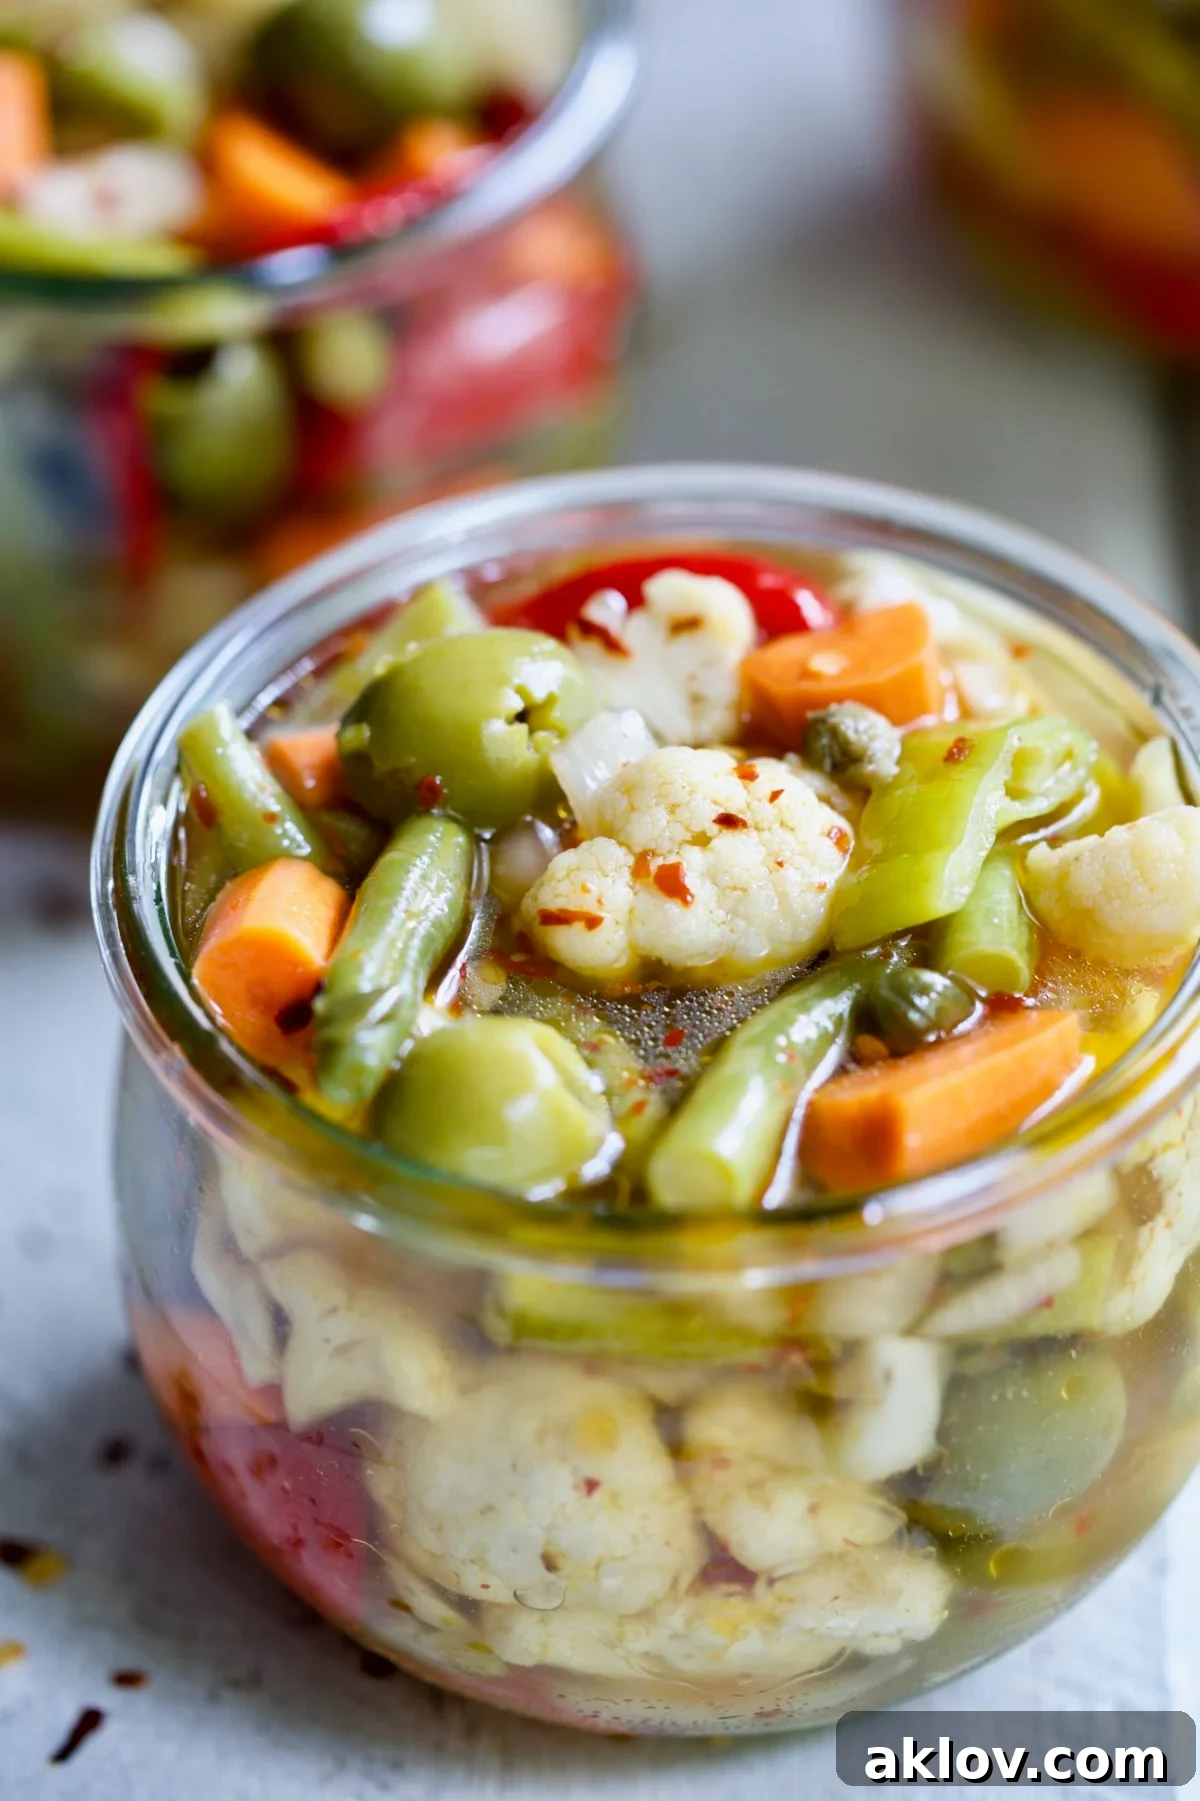
A homemade Giardiniera recipe, also known as Italian Pickled Vegetables, is a classic condiment that offers a burst of vibrant flavor far superior to anything you’ll find on store shelves. Crafting your own allows for complete control over the taste, spice level, and the freshest ingredients, making it a truly rewarding culinary endeavor. It’s an excellent method to preserve a bounty of fresh vegetables for future enjoyment, transforming them into a versatile addition to countless meals. Whether you’re enhancing the taste of your favorite burgers and sandwiches, serving it as a stunning component on an antipasto platter, or simply enjoying it as a healthful and ready-made side dish, homemade Giardiniera is an indispensable staple for any food lover.
“This recipe is absolutely fantastic. It’s ideal as an appetizer or a refreshing accompaniment to grilled meats on a warm summer evening. The best part is that it’s a make-ahead dish; the longer it marinates, the more incredible the flavors become. Truly a brilliant recipe!”
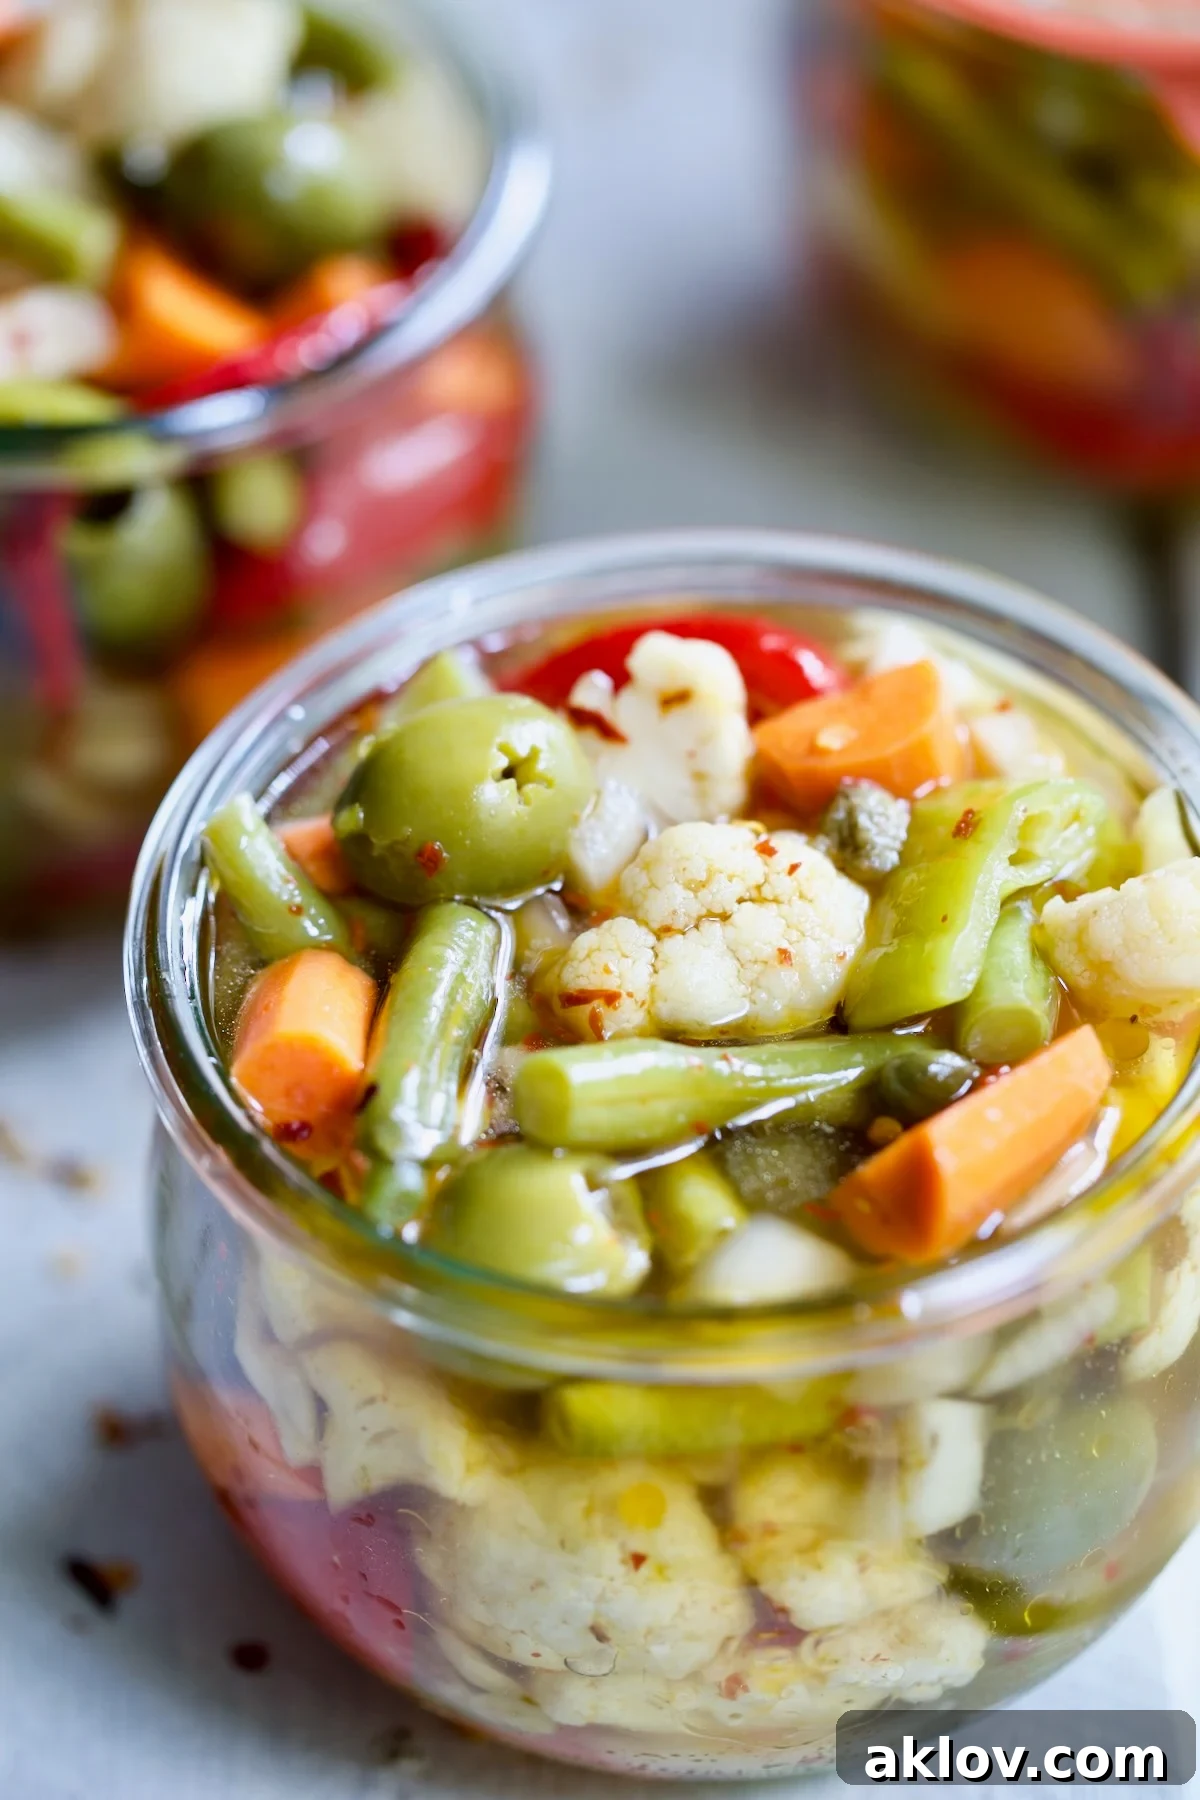
Homemade Giardiniera: Authentic Italian Pickled Vegetables Recipe
Welcome to the ultimate guide for making traditional Giardiniera right in your own kitchen! This detailed recipe will walk you through every step of creating this beloved Italian condiment, ensuring a result that’s bursting with flavor and freshness. Forget bland, overly vinegary store-bought versions; homemade Giardiniera is a revelation, offering a crisp texture and a perfect balance of savory, sweet, and tangy notes, often with a delightful kick of spice. Whether you’re a seasoned pickler or new to the art of food preservation, this recipe is designed to be straightforward and immensely satisfying.
What is Giardiniera? A Journey from Italian Gardens to Your Table
Giardiniera, an Italian term eloquently translating to “from the garden,” embodies the rustic charm and resourceful spirit of Italian culinary traditions. At its core, giardiniera consists of an assortment of fresh vegetables, expertly pickled in a tangy vinegar brine. This ancient method of food preservation was born out of necessity in the sun-drenched rolling hills of Italy, where villagers sought ingenious ways to extend the bounty of their gardens beyond the fleeting summer and autumn harvests, ensuring a supply of wholesome food throughout the colder winter months.
The beauty of giardiniera lies in its adaptability. While a wide variety of vegetables can be embraced in these flavorful pickles, classic recipes most frequently feature a harmonious blend of crisp cauliflower florets, vibrant carrots, crunchy celery, aromatic onions, fiery hot chiles, sweet bell peppers, and briny olives. Each vegetable contributes its unique texture and flavor, creating a complex and satisfying medley that truly shines.
It’s important to note the distinction between traditional Italian-style Giardiniera and its famous American cousin, Chicago-style Giardiniera. Authentic Italian recipes typically focus on a brighter, more vinegary brine, allowing the natural flavors of the pickled vegetables to take center stage. Chicago-style, on the other hand, is uniquely characterized by its two-step process: vegetables are first pickled in vinegar, much like the Italian tradition, but then they are generously marinated in olive oil, often infused with additional spices, resulting in a richer, oilier condiment that’s a staple on Italian beef sandwiches and hot dogs in the Windy City. This recipe leans into the classic, vibrant Italian vinegar-based profile, offering a truly refreshing experience.
Why This Homemade Giardiniera Recipe is a Must-Try!
If you, like me, have a profound appreciation for anything pickled, then prepare to fall in love with this homemade Giardiniera recipe. It unequivocally outshines any store-bought alternative, offering a depth of flavor, crispness, and freshness that simply cannot be replicated by mass-produced varieties. Making it yourself means you’re in control of every ingredient, ensuring a condiment free from unwanted preservatives and artificial flavors.
The secret to its exceptional taste lies in a meticulously crafted brine, a perfect symphony of white wine vinegar, pure water, and a thoughtful selection of fresh herbs and aromatic spices. This flavorful liquid gently permeates the vegetables, transforming them into a culinary delight. What makes this recipe truly versatile is the freedom it offers for customization; you can easily vary the vegetables based on what’s in season, what you have readily available, or your personal preferences. It’s a fantastic opportunity to experiment and make the recipe truly your own.
Beyond its incredible taste, this Giardiniera recipe serves as a brilliant solution for minimizing food waste. Do you ever find a handful or two of vegetables lingering in your refrigerator drawer, nearing the end of their prime? This recipe provides a delicious and practical way to rescue them from oblivion. By pickling them, you extend their shelf life significantly, transforming them into a flavorful, ready-to-use condiment with an impressive array of culinary applications:
- Elevate Sandwiches and Burgers: Serve it as is, or coarsely chopped, on classic beef burgers, gourmet sandwiches, hot dogs, and bratwurst for an irresistible tangy crunch.
- Savory Sandwich Spread: Drain and finely chop the pickled vegetables, then mix them into mayonnaise or aioli for a vibrant and flavorful sandwich spread that’s perfect for deli meats or grilled cheese.
- Enhance Salads: Incorporate drained and chopped Giardiniera into pasta salads, grain salads, or green salads to add a zesty Italian flair and delightful texture.
- Antipasto or Charcuterie Platter Star: Arrange this colorful medley on an antipasto or charcuterie board, where its bright flavors beautifully complement cured meats, cheeses, and crusty bread.
- Side Dish or Garnish: Finely chop and serve it alongside simply roasted chicken, tender beef, succulent pork, or rich, cheesy entrees like a Cheesy Skillet Chicken Pot Pie. It cuts through richness and adds a refreshing counterpoint.
- Breakfast Boost: A spoonful can even brighten up scrambled eggs or an omelet, adding an unexpected but welcome tang.
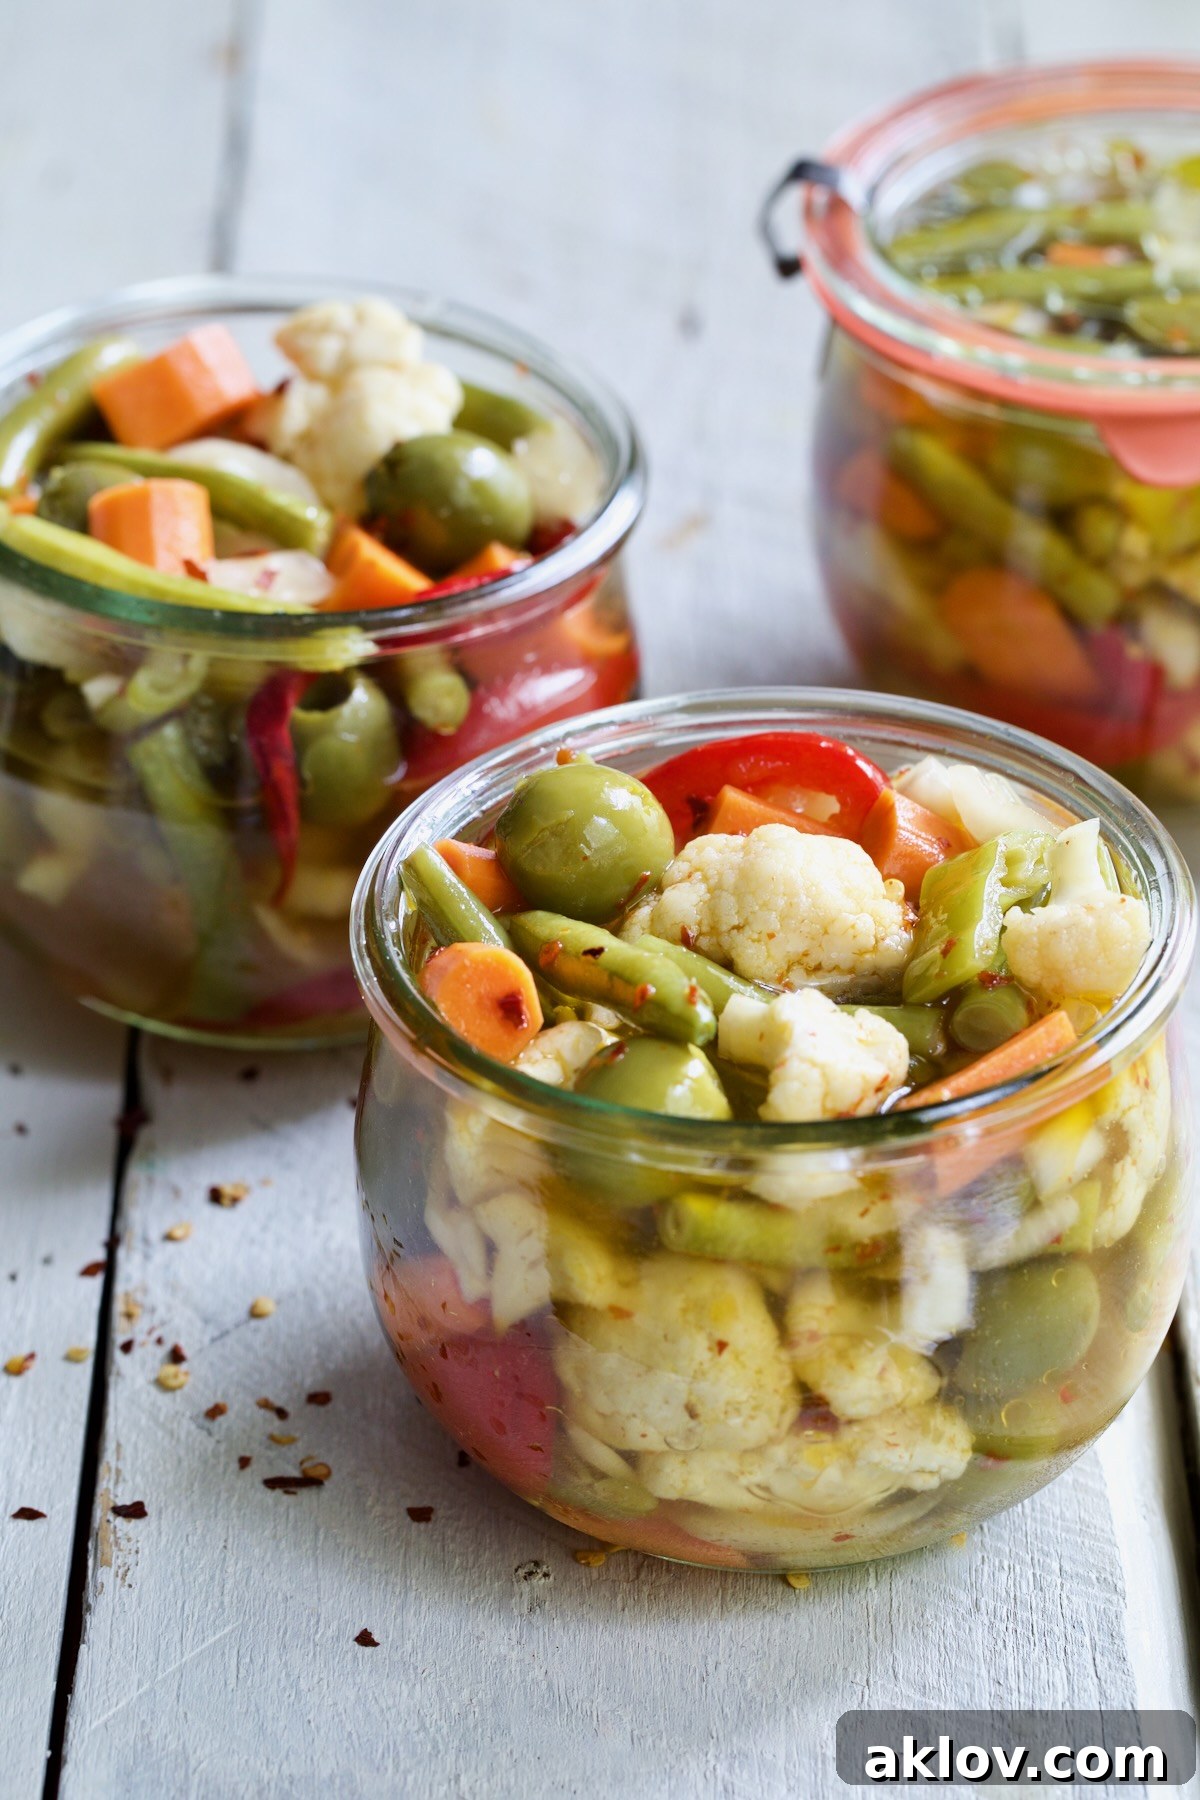
How to Make Giardiniera (Italian Pickled Vegetables): A Step-by-Step Guide
Essential Recipe Ingredients:
To embark on your Giardiniera journey, you’ll need a selection of quality ingredients for both the vibrant vegetable mix and the aromatic pickling brine. Remember, fresh, high-quality vegetables will yield the best results for your homemade Italian pickled vegetables. Here’s a comprehensive look at everything you’ll need; detailed quantities are provided in the full recipe card below.
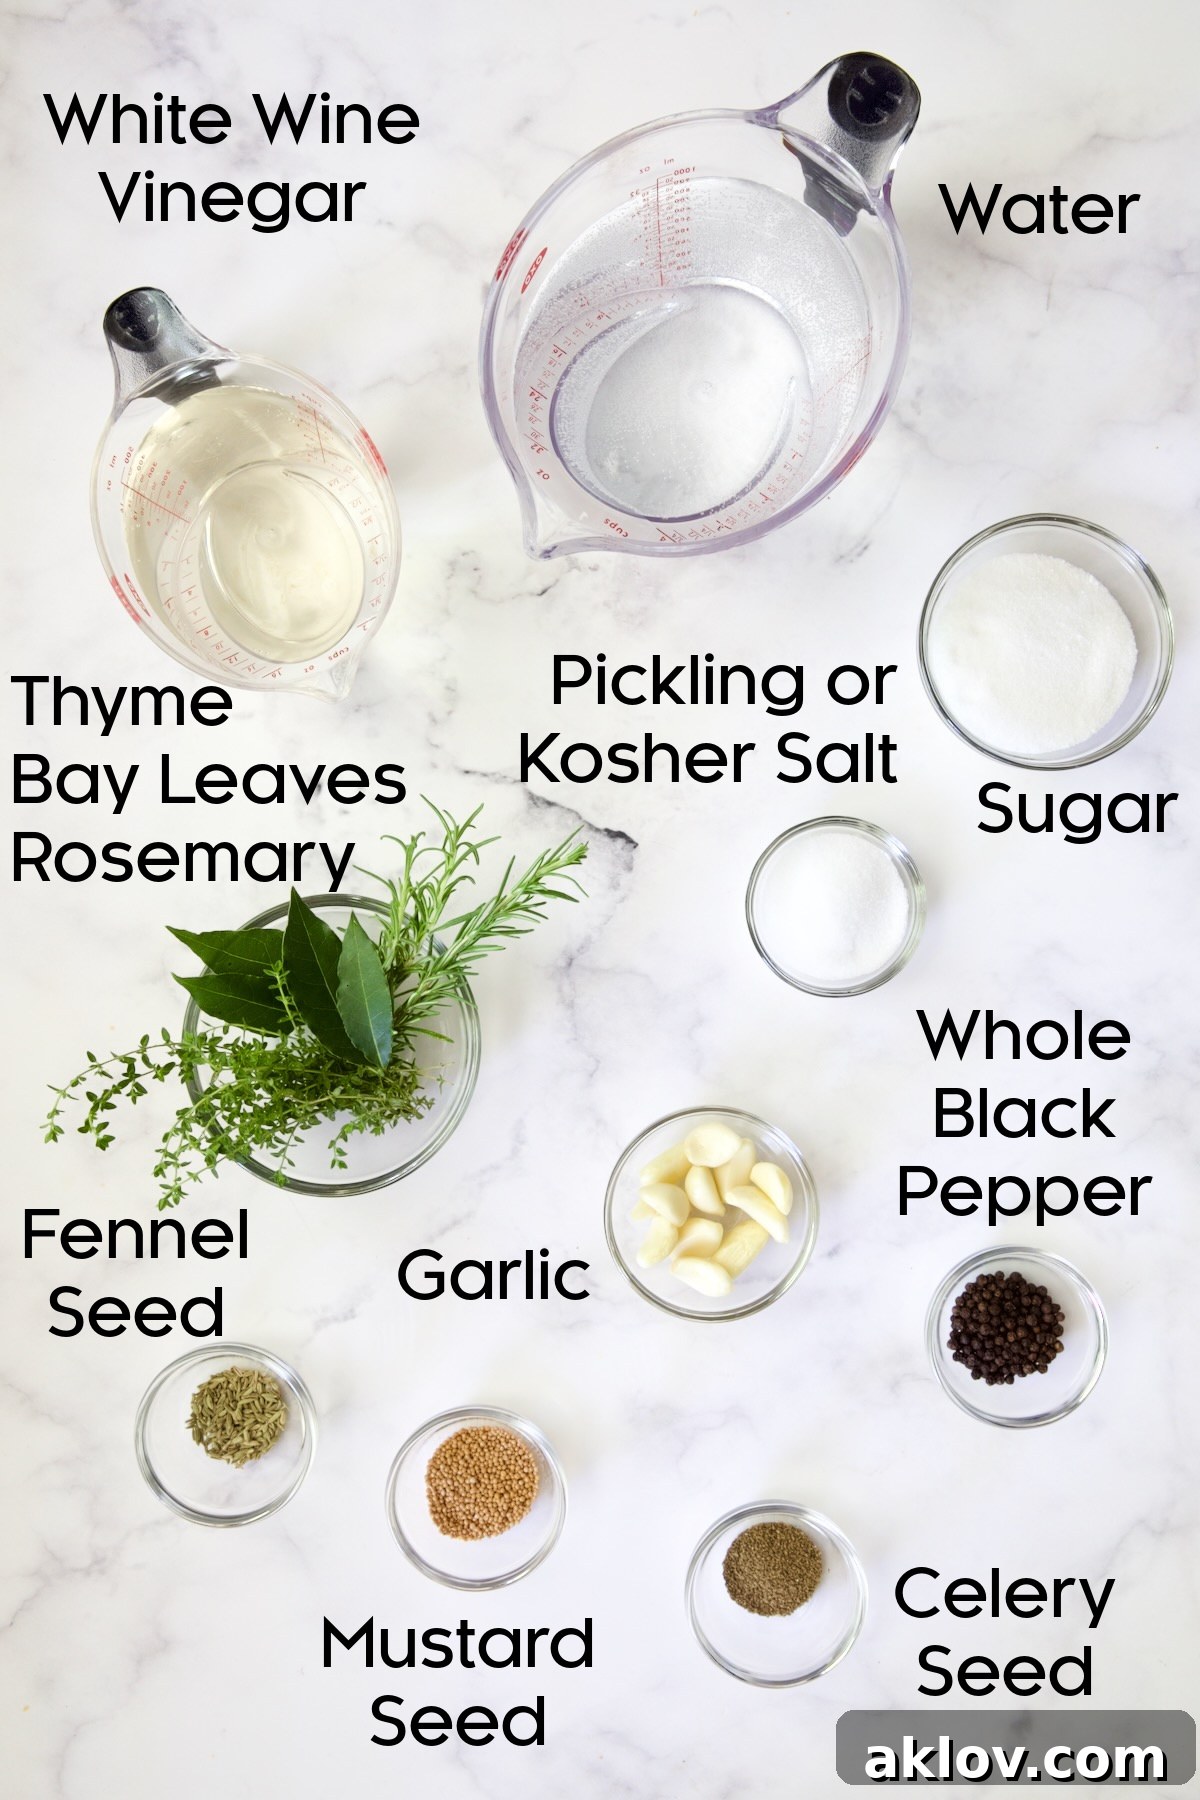
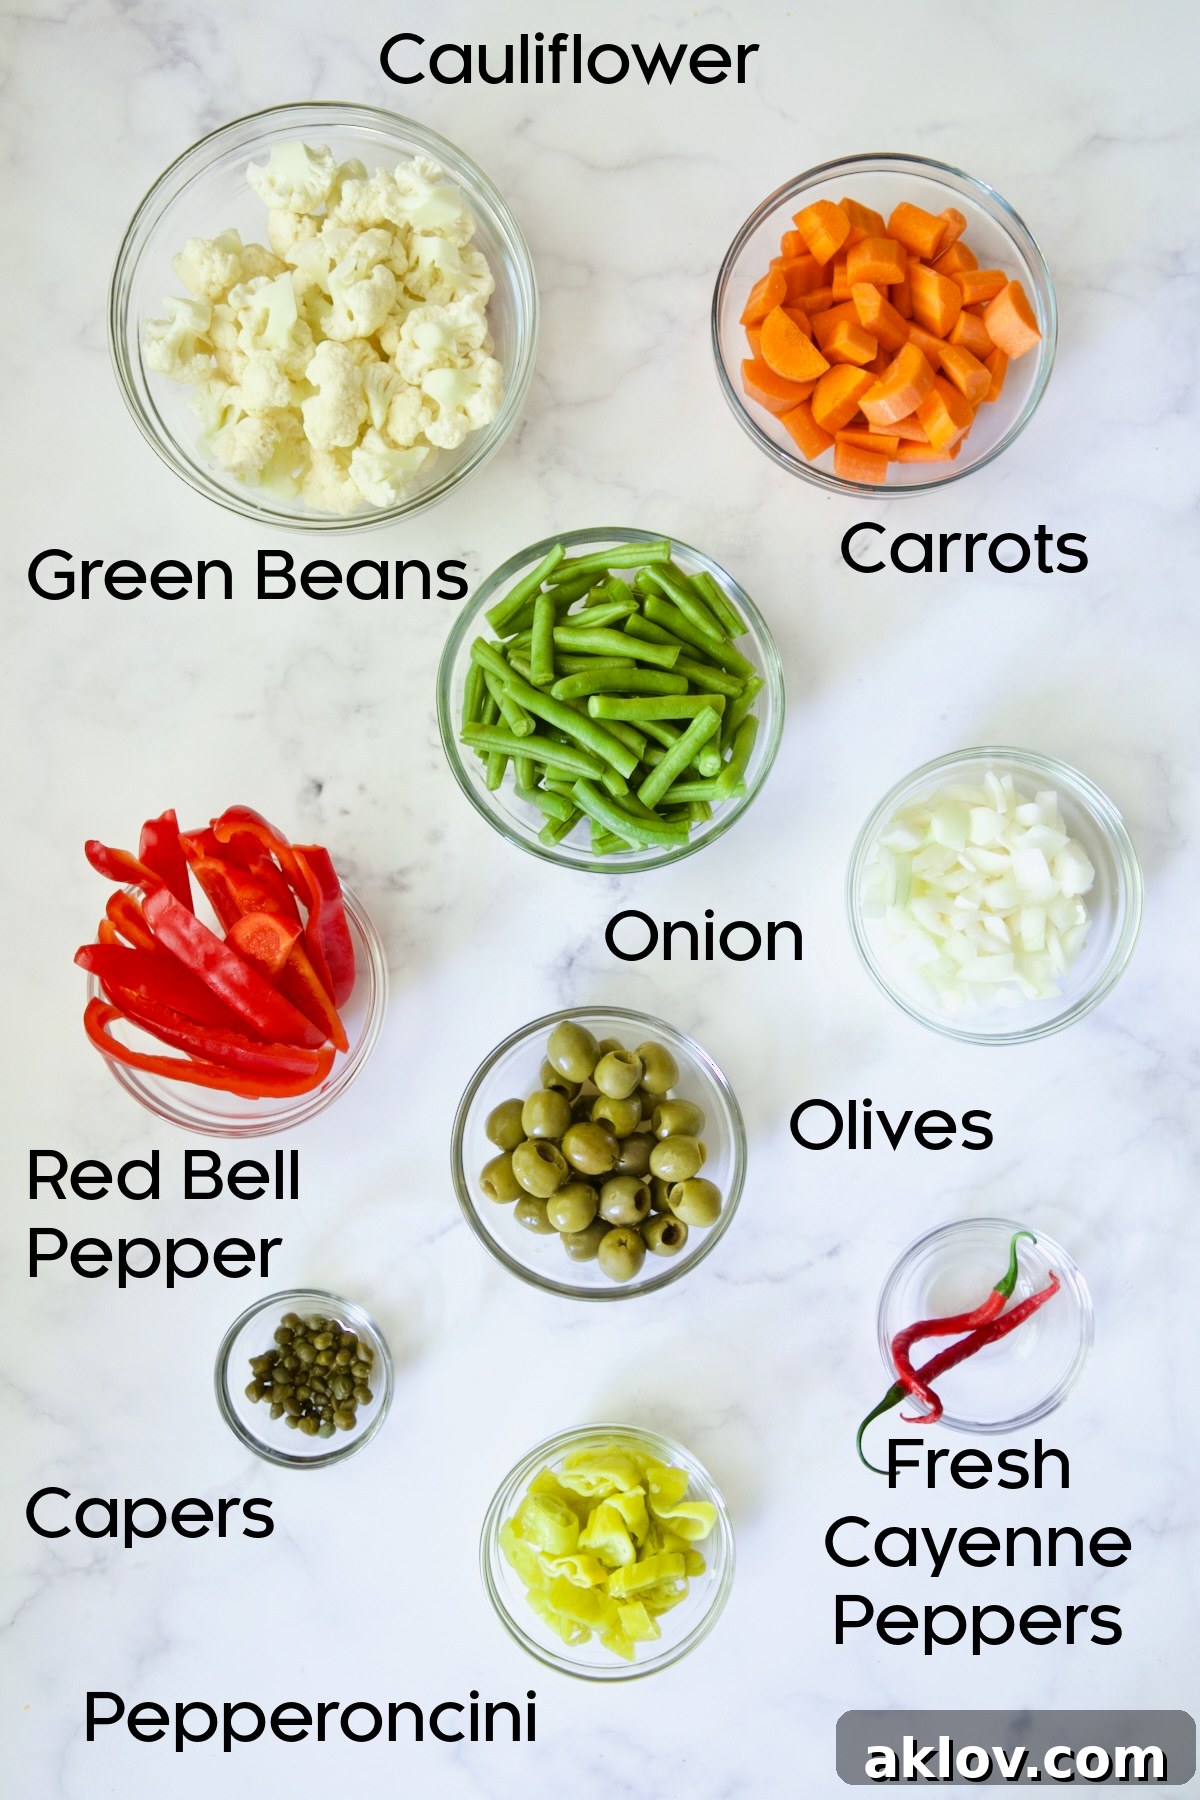
Ingredient Notes and Smart Substitutions:
- White Wine Vinegar: For this authentic Giardiniera recipe, white wine vinegar is the preferred choice over white *distilled* vinegar. Its milder, slightly sweeter, and more nuanced flavor profile is derived from fermented wine, lending a sophisticated tang to the brine. White distilled vinegar, made from grain alcohol, is considerably more potent and can impart a harsh acidity that might overpower the delicate vegetable flavors. While a trace amount of alcohol may remain in white wine vinegar, it’s generally negligible. If you can’t find white wine vinegar, apple cider vinegar can be a good substitute for a fruitier note, though it will alter the classic flavor.
- Salt: The type of salt you use is crucial for clear and crisp pickles. Always opt for pickling or kosher salt. Pickling salt, also known as canning salt, is a pure, finely textured salt that dissolves quickly and uniformly in brines. Critically, it contains no anti-caking agents or iodine, which are commonly found in regular table salt. These additives can lead to a cloudy brine and may even affect the texture and color of your pickled vegetables. Kosher salt is also an excellent choice as it is pure salt, free of anti-caking agents, though its coarser texture may take a little longer to dissolve.
- Mustard Seed: Yellow mustard seeds offer a mild, slightly pungent flavor that is characteristic of many pickled goods. However, don’t hesitate to experiment with brown mustard seeds if you prefer a sharper, more intense mustard flavor. A combination of both can also add complexity.
- The Vegetables: Cauliflower is almost synonymous with Giardiniera, providing a delightful crunch and absorbing the brine beautifully. Carrots are another staple, adding sweetness and vibrant color. In this recipe, green beans and red bell pepper were chosen for their availability and fresh appeal, but the beauty of homemade Giardiniera lies in its flexibility. Other fantastic options include crisp asparagus spears, quartered Brussels sprouts, unique pattypan squash, sliced zucchini, pearl onions, or even small chunks of celery. Ensure all vegetables are cut into similar, bite-sized pieces for even pickling.
- Green Olives: Castelvetrano olives are a superb choice for Giardiniera due to their firm, meaty texture and wonderfully buttery, mild flavor that doesn’t overpower the other ingredients. Sicilian green olives or other large, mild green olives can also be used. Make sure they are pitted for ease of eating.
- Capers: These small, green, unripened flower buds of the caper bush are traditionally pickled in a salty brine or vinegar and offer a distinctive tangy, salty, and slightly floral punch. You’ll typically find them in the pickled products or international aisle of your grocery store. They add an essential layer of savory complexity.
- Cayenne Peppers: For those who appreciate a good kick, fresh cayenne peppers were used here, complemented by crushed red pepper flakes, to achieve a wonderfully spicy Giardiniera. If fresh cayenne isn’t available, dried cayenne peppers can be substituted. Remember, the heat level is entirely adjustable to your personal tolerance — feel free to reduce or increase the amount of peppers and flakes to suit your palate.
- Fresh Herbs: Bay leaves, thyme, and rosemary contribute an aromatic depth to the brine. Fresh herbs are always recommended for a more vibrant flavor, but dried herbs can be used in a pinch, typically at half the fresh quantity.
Detailed Step-By-Step Instructions:
Crafting your own Giardiniera is a straightforward process that yields incredibly delicious results. Follow these steps carefully to ensure a perfectly pickled batch of Italian vegetables.
- Preparation is Key: Begin by gathering all your ingredients and thoroughly prepping your vegetables. This means washing, peeling (if necessary), and cutting them into uniform, bite-sized pieces. Smashed garlic cloves are excellent for infusing flavor into the brine.
- Prepare the Brine: In a sturdy saucepan, combine the water, white wine vinegar, sugar, smashed garlic cloves, fresh bay leaves, thyme sprigs, rosemary sprigs, black peppercorns, mustard seeds (yellow or brown), celery seed, fennel seed, and pickling/kosher salt. Bring this mixture to a rolling boil over high heat. Once boiling, reduce the heat to medium and allow it to simmer vigorously for 5 minutes, ensuring all the flavors meld beautifully and the sugar and salt are fully dissolved.
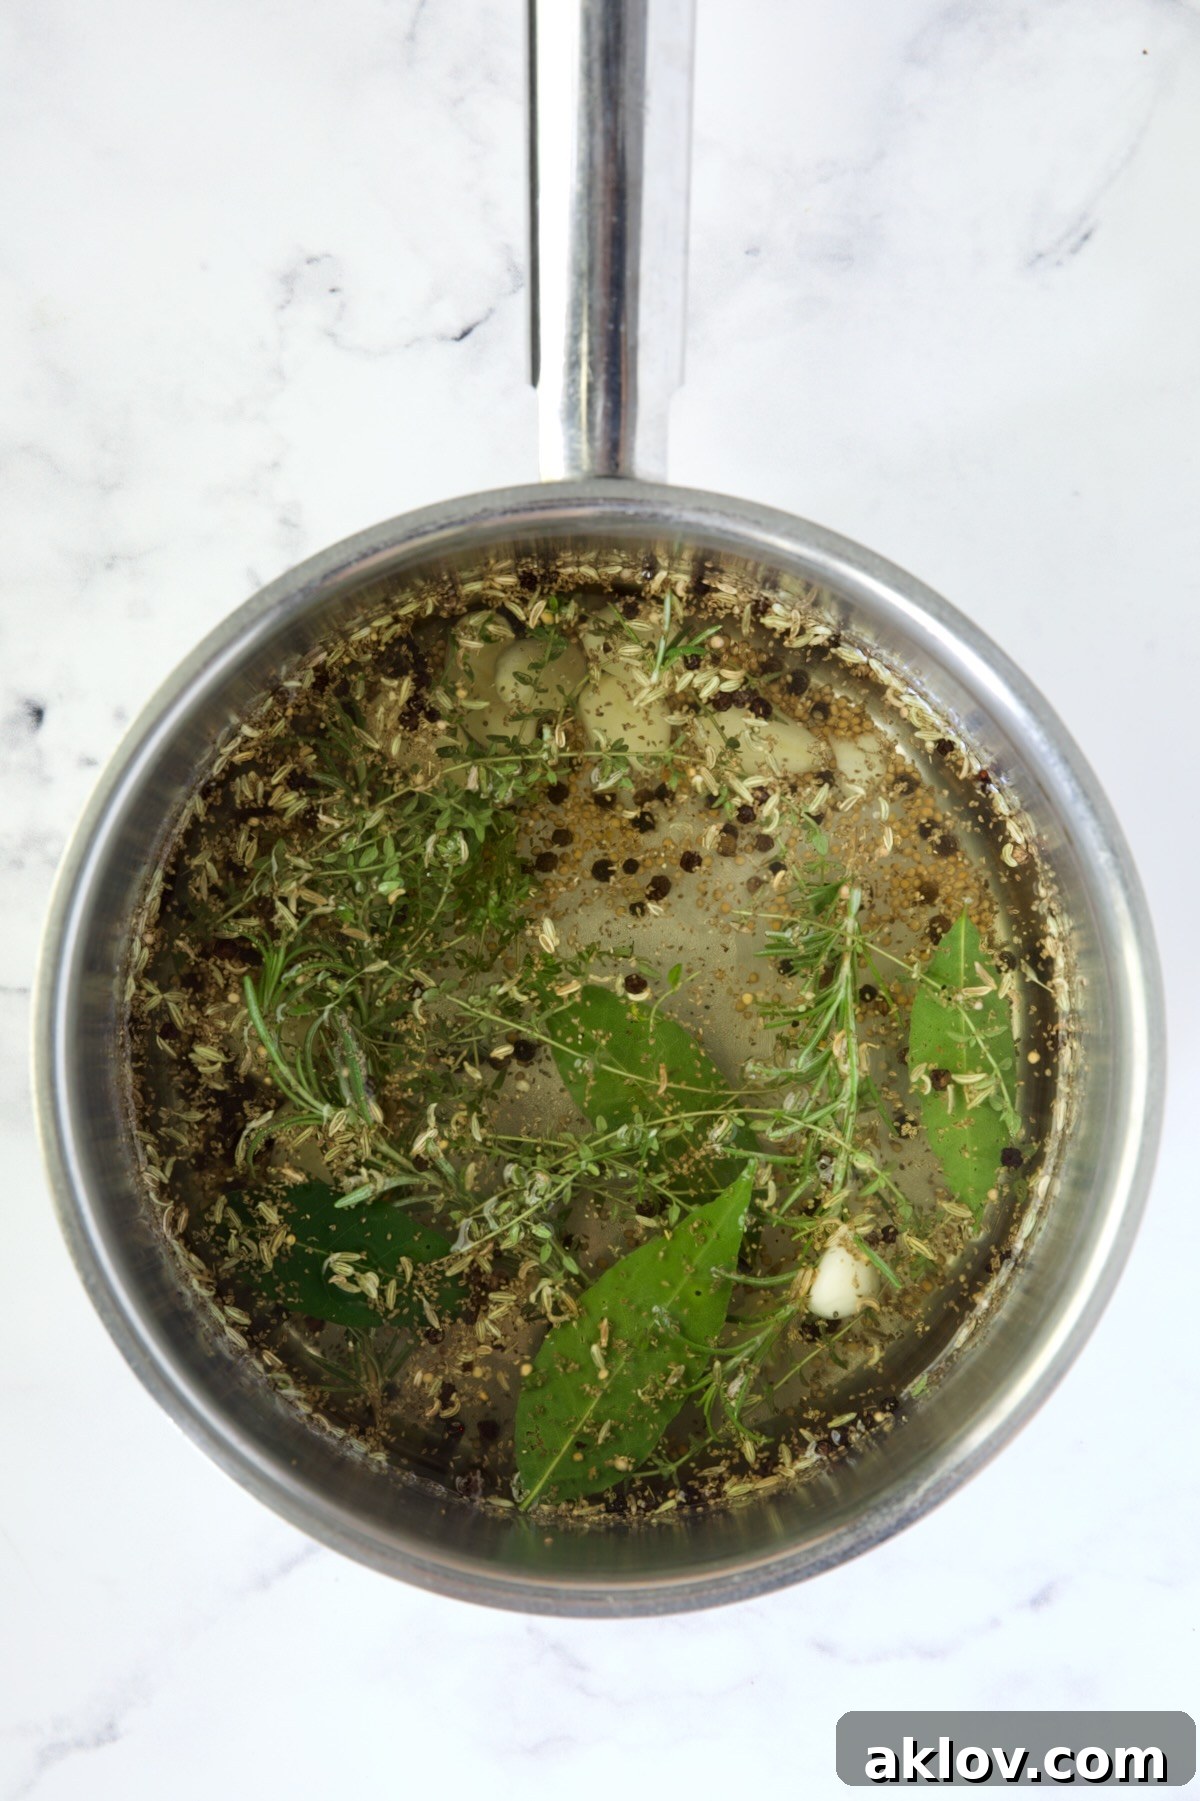
- Steep the Brine: After simmering, remove the saucepan from the heat, cover it tightly, and let the brine stand undisturbed for 30 minutes. This crucial steeping period allows the herbs and spices to further infuse their aromas and flavors into the liquid, creating a richer, more complex brine.
- Arrange the Vegetables: While the brine is steeping, carefully arrange your prepped vegetables — cayenne peppers (or red pepper flakes), cauliflower florets, sliced carrots, chopped onion, red bell pepper strips, green beans, olives, pepperoncini, and capers — into a large, clean, heat-proof glass jar. Pack them snugly but avoid crushing. A gallon-sized jar or multiple smaller jars work well.
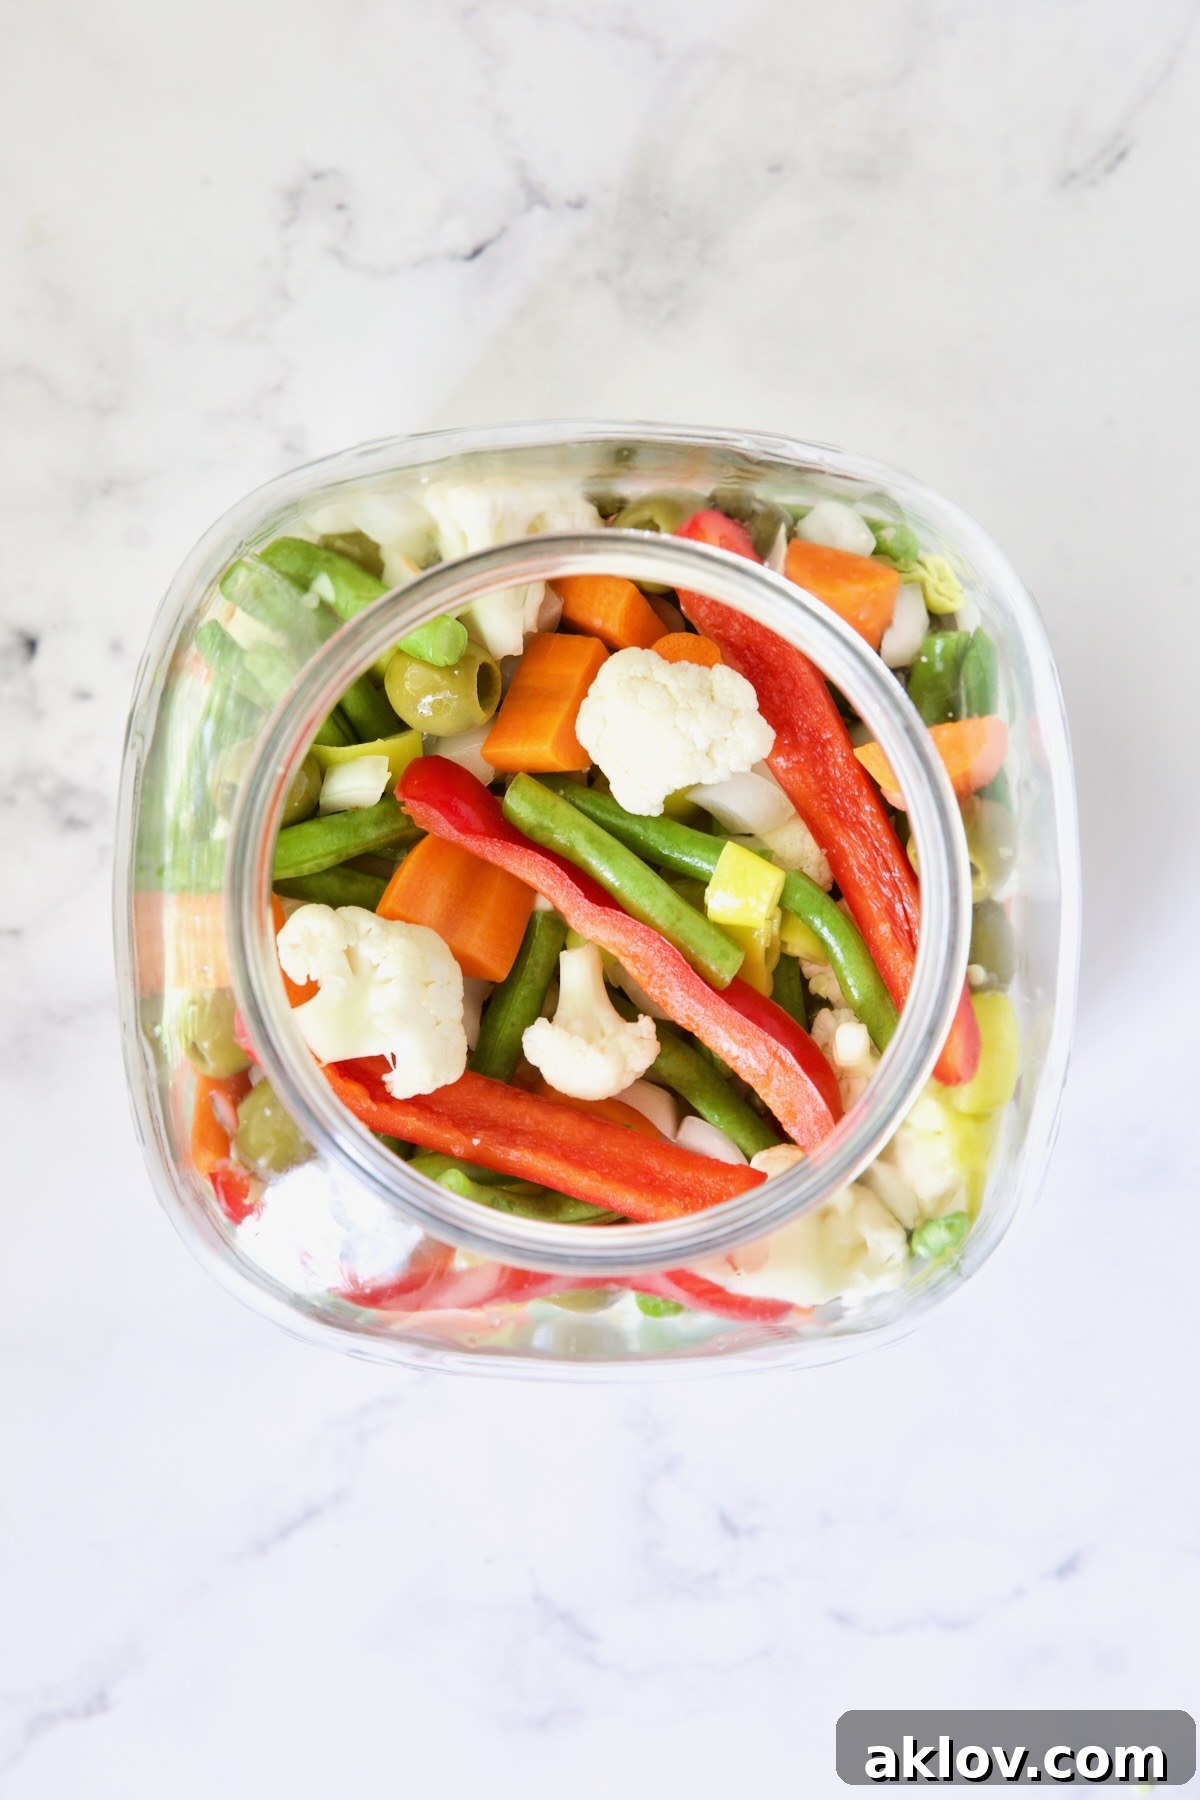
- Reheat and Strain the Brine: Strain the steeped brine through a fine-mesh sieve directly back into the saucepan, discarding the spent herbs and spices. This ensures a clear brine. Bring the strained brine back to a gentle simmer.
- Pour Over Vegetables: With extreme caution, slowly and carefully pour the hot, simmering brine over the vegetables in the glass jar. Ensure that all the vegetables are completely submerged in the liquid. You may need to gently press them down with a clean utensil or a fermentation weight to keep them under the surface. This is vital to prevent spoilage and ensure even pickling.
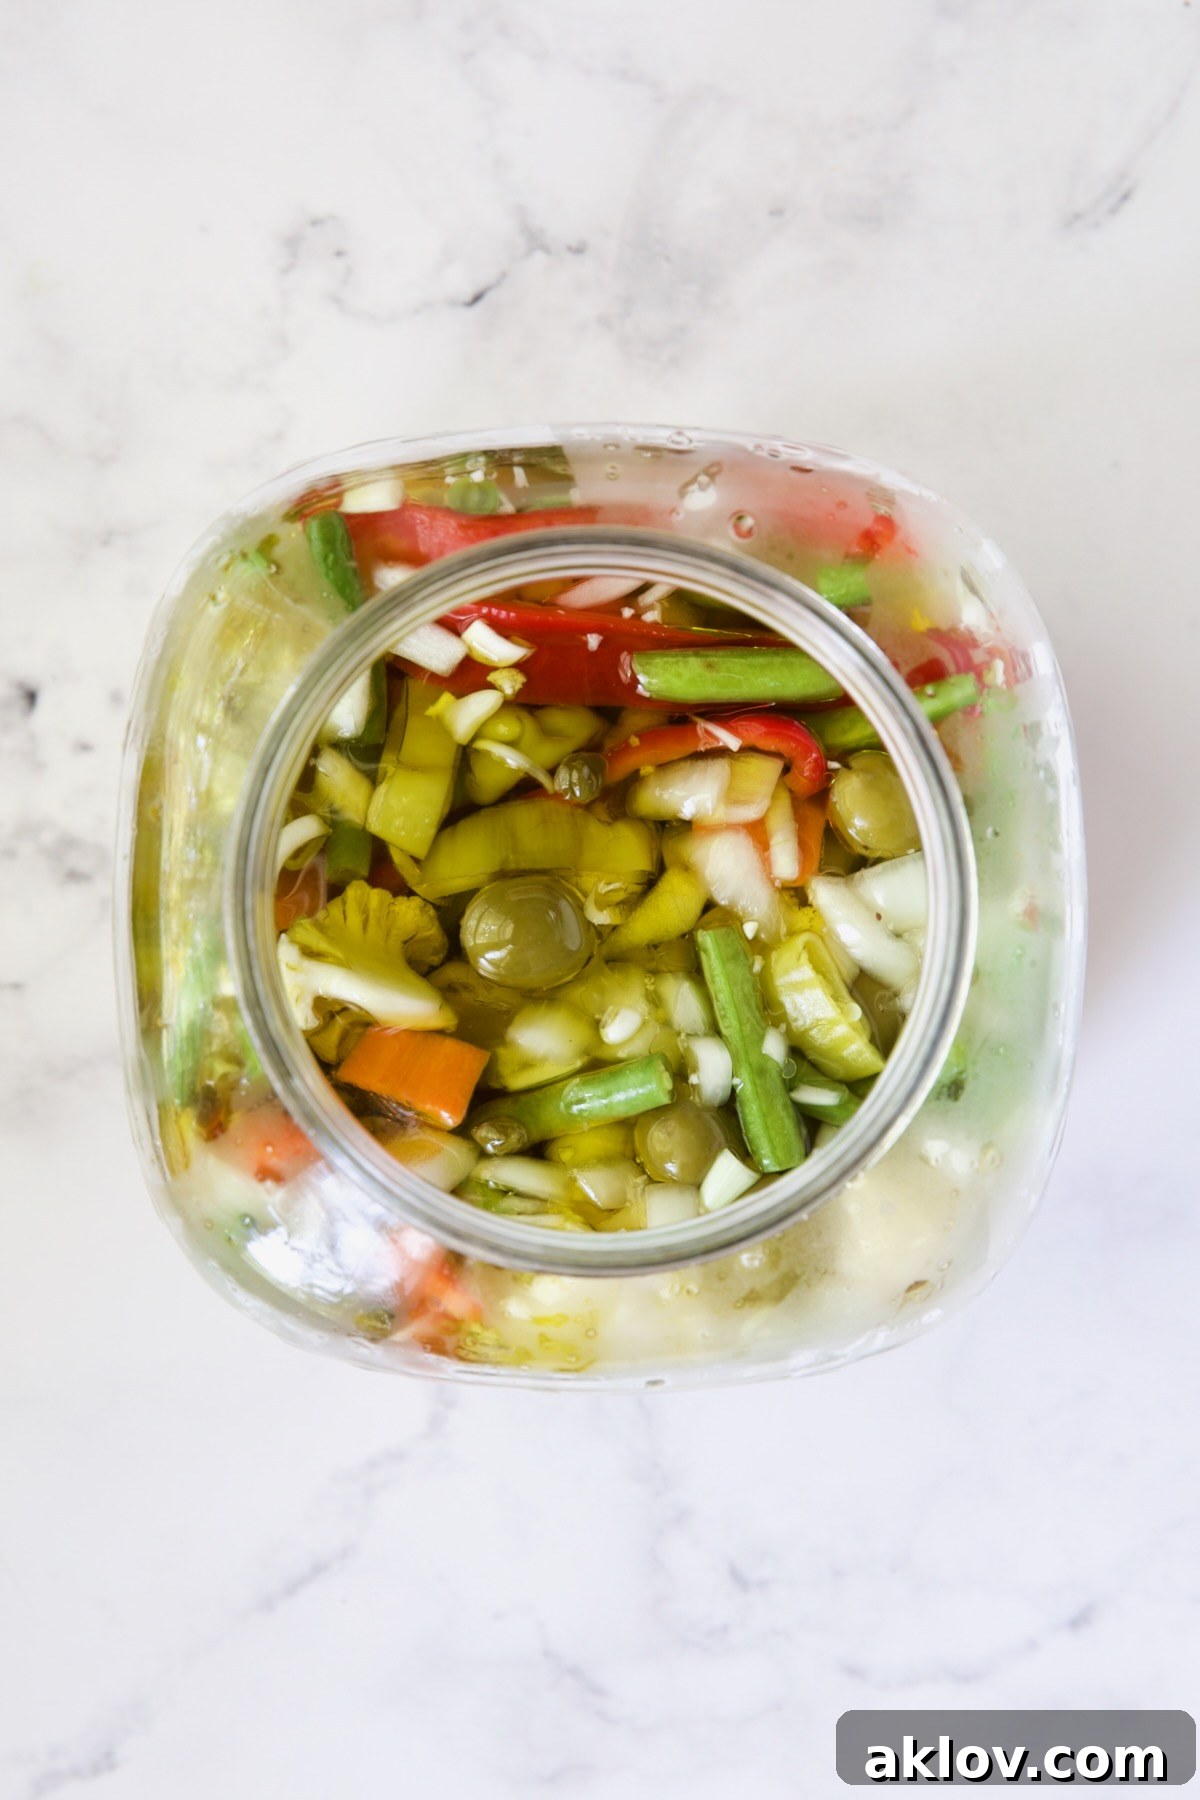
- Cool and Marinate: Allow the jar of Giardiniera to cool completely to room temperature on your countertop. During this cooling phase, periodically check to ensure the vegetables remain fully submerged in the brine. This process helps the vegetables absorb the flavors.
- Add Olive Oil and Refrigerate: Once completely cool, add the olive oil to the jar. Gently stir to distribute the oil evenly throughout the Giardiniera. The olive oil will add richness and a beautiful mouthfeel, characteristic of Chicago-style influence, but in a balanced Italian way. Secure the lid and refrigerate the Giardiniera for at least three days. This crucial maturation period allows the flavors to deepen and meld, resulting in the best possible taste.
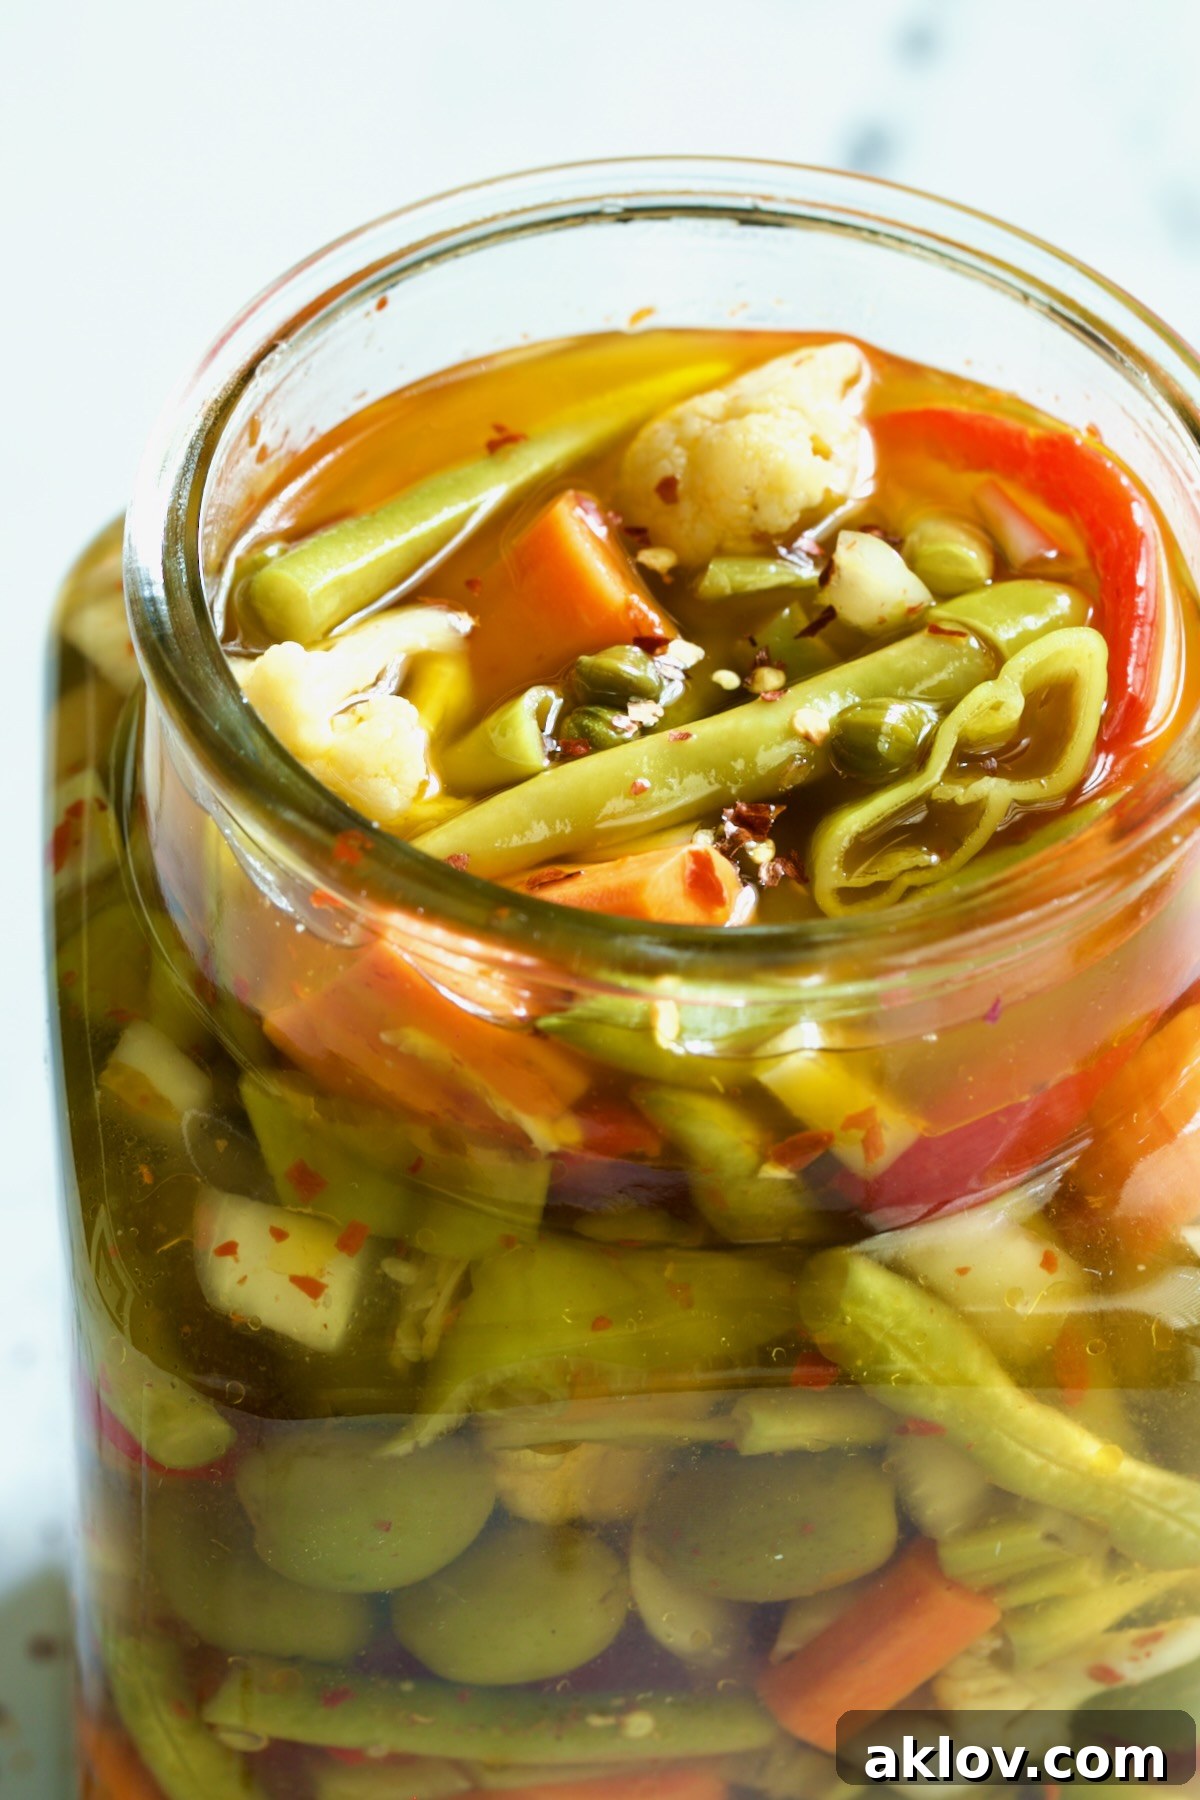
- Enjoy and Re-Jar (Optional): After three days of refrigeration, your homemade Giardiniera is ready to enjoy! You may notice the vegetables have lost some of their initial bulk, taking up less space in the jar. At this point, you can leave it in the large jar or transfer it to smaller, sterilized jars for easier storage and serving.
- Maintain Submersion: Continue to check the Giardiniera periodically, ensuring all vegetables remain fully submerged in the brine and oil mixture. This maintains quality and extends shelf life.
- Storage: Your delicious homemade Giardiniera will keep beautifully in the refrigerator for up to 30 days. Enjoy it on everything!
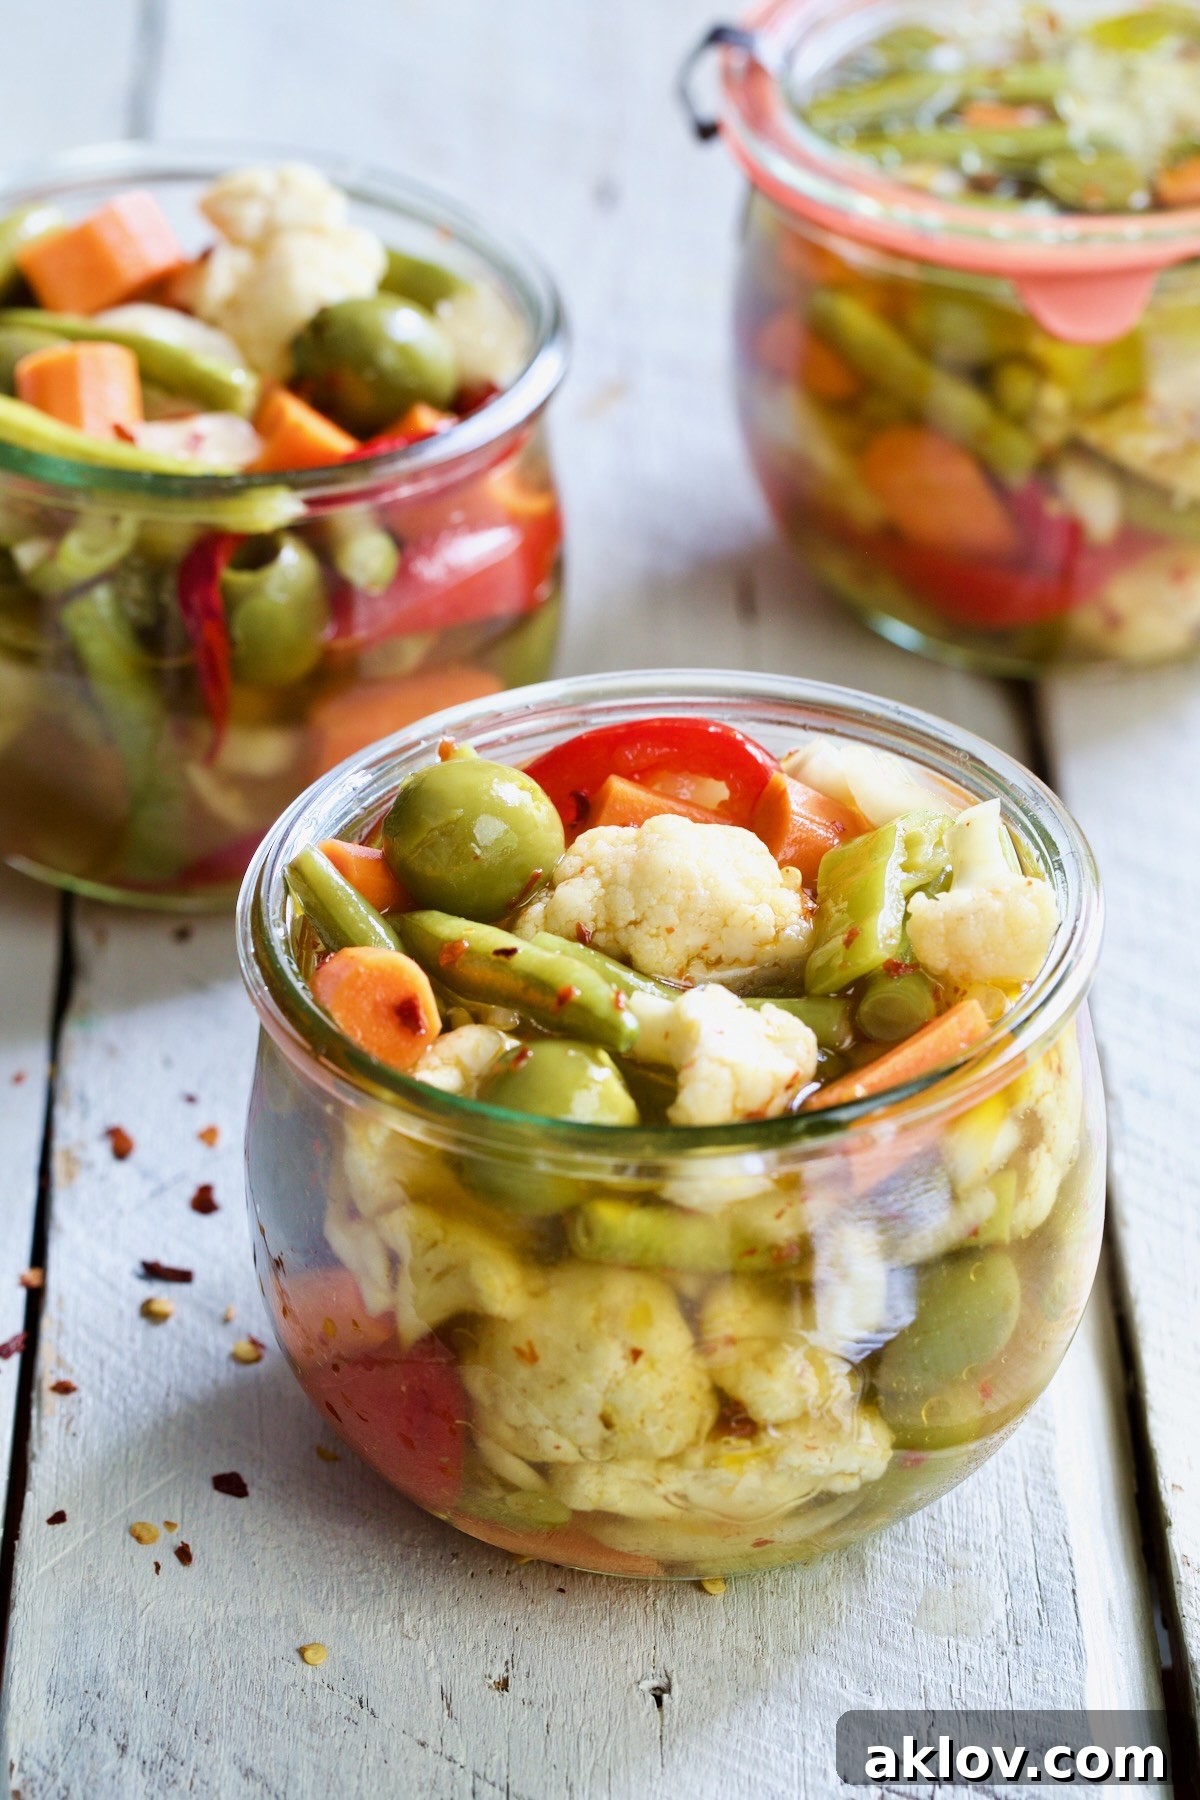
Chef Tips and Tricks for the Perfect Giardiniera
- Chunky vs. Chopped: While finely chopping your Giardiniera makes it easier to layer on sandwiches and burgers, consider keeping your homemade batch chunky. Larger pieces offer more versatility, allowing you to serve it as a vibrant side dish, a component of an antipasto, or even grill them lightly. You always have the option to chop them up later right before serving for specific applications.
- Don’t Discard the Brine!: The flavorful brine left behind after you’ve devoured your Giardiniera is a liquid goldmine! Don’t throw it away. Strain it and save it in a separate container. This tangy, herb-infused liquid makes an incredibly delicious and unique salad dressing, a fantastic marinade for chicken or fish, or even a zesty splash for deglazing a pan after cooking.
- Sterilization is Key: For maximum shelf life and safety, always ensure your glass jars and lids are thoroughly sterilized before adding the vegetables and brine. You can do this by boiling them for 10 minutes or running them through a hot dishwasher cycle.
- Allow for Proper Marination: Patience is truly a virtue with Giardiniera. While it might be tempting to taste it immediately, allow it to marinate in the refrigerator for the full three days. This time is essential for the vegetables to fully absorb the complex flavors of the brine and olive oil, resulting in a much more developed and satisfying taste.
- Maintaining Submersion: Always make sure your vegetables are fully submerged under the brine. Any pieces exposed to air can soften or, worse, spoil. Use a small plate, a fermentation weight, or even a food-grade plastic bag filled with water to keep the vegetables pressed down.
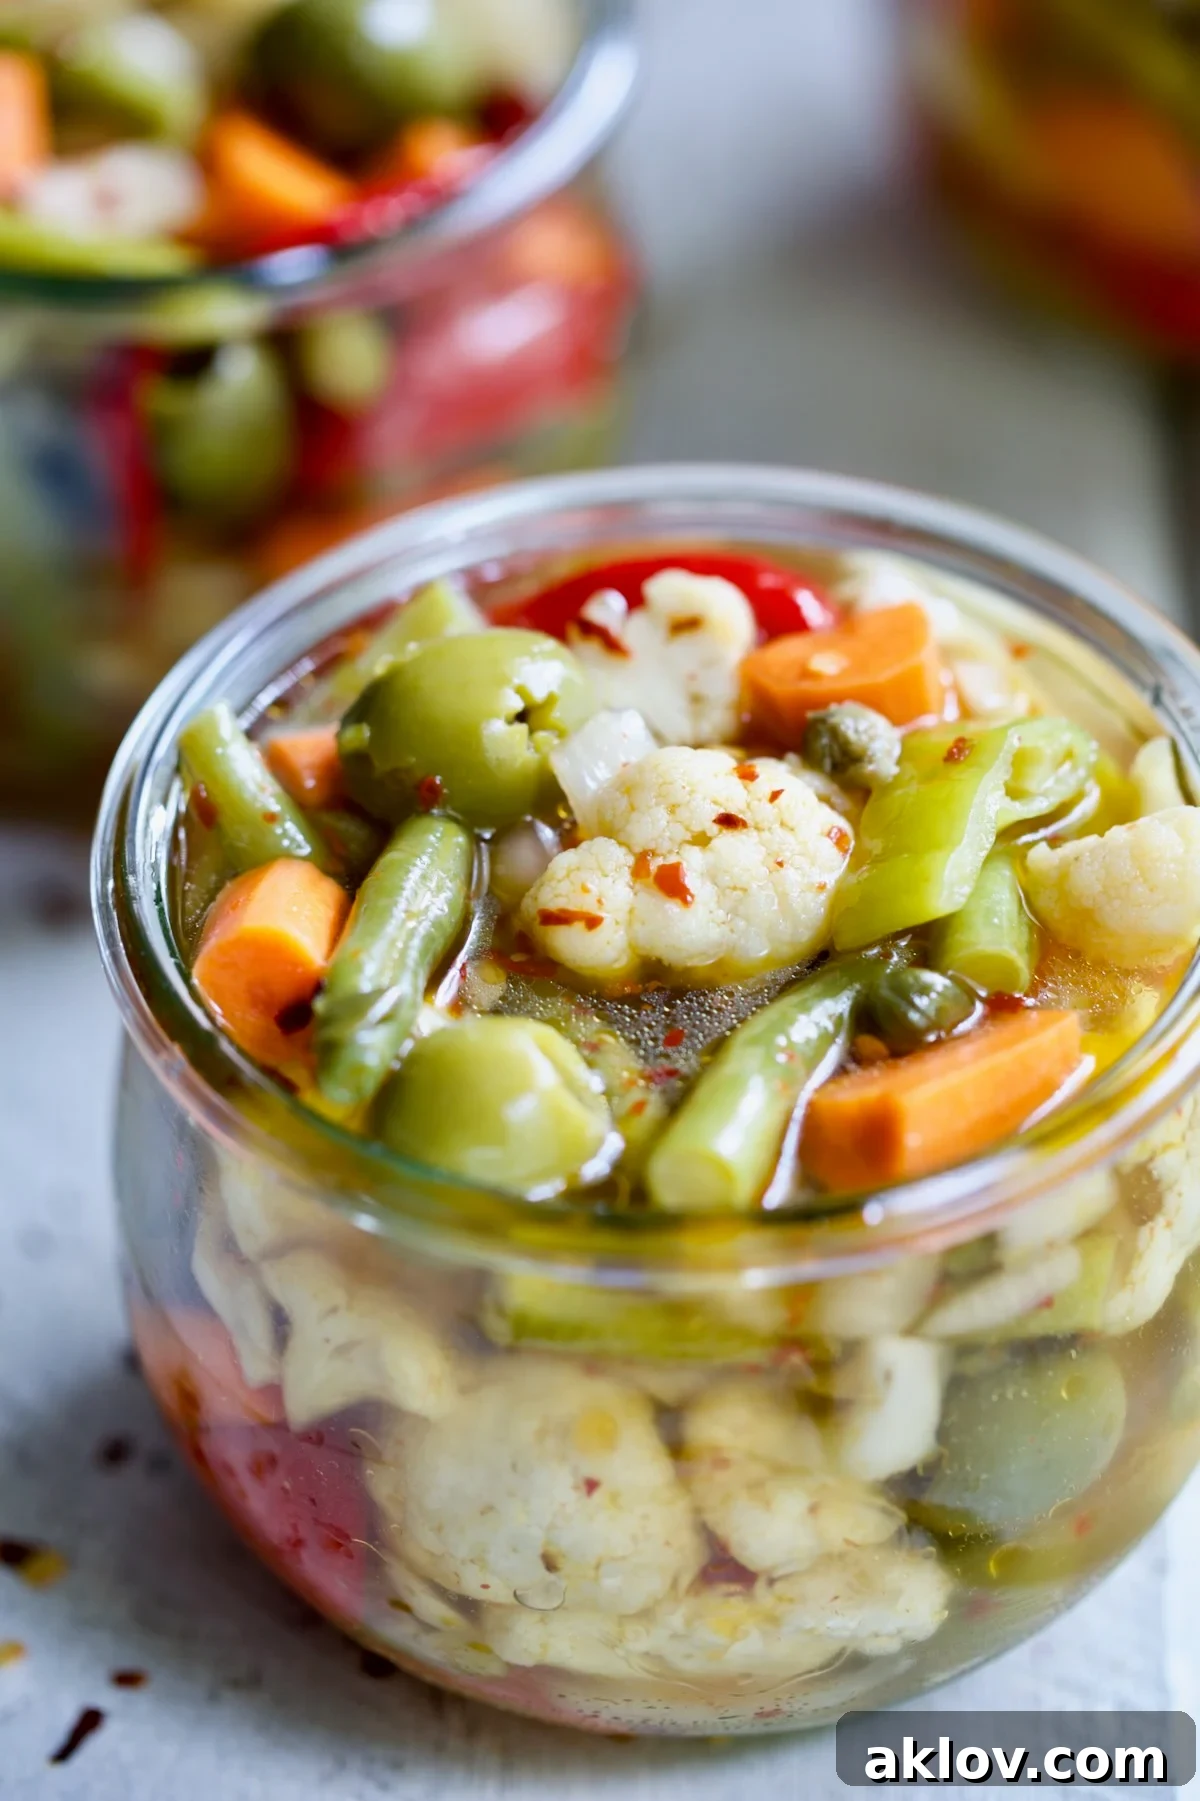
Giardiniera Recipe FAQs: Your Questions Answered
Yes, for safety and to maintain freshness and crispness, homemade Giardiniera absolutely needs to be refrigerated. While the vinegar acts as a preservative, it’s not a sterile canning process unless specific water-bath canning steps are followed (see below). Refrigeration slows down spoilage and bacterial growth. For optimal flavor and texture, it’s often best served at room temperature, so simply allow it to sit out on the counter for 15 to 20 minutes before serving to let the flavors truly blossom.
Giardiniera’s deep-rooted popularity in Chicago can be traced back to the late 19th century with the significant wave of Italian immigrants who settled in the city. These immigrants brought their culinary traditions, including the art of pickling garden vegetables. A pivotal moment came with Vincent Formusa, an immigrant from Termini Imerese, Sicily, who founded the V. Formusa Co. This company became famous for its Marconi brand of Giardiniera, particularly the oil-packed, spicy Chicago-style variant. It quickly became an iconic condiment, especially beloved on Chicago’s signature Italian beef sandwiches and hot dogs, becoming an inseparable part of the city’s unique food culture.
The correct pronunciation of Giardiniera can sometimes be a mouthful for English speakers, but it’s quite simple once you know: jar-deen-YAIR-uh. Practice it a few times, and you’ll sound like a seasoned Italian cook!
Yes, this Giardiniera recipe can certainly be adapted for water-bath canning, which allows for much longer, shelf-stable storage. If you choose to can it, there are a few important modifications:
- You should start with raw vegetables in your sterilized jars.
- Crucially, you must omit the olive oil during the canning process. Oil interferes with safe heat penetration during canning and can create a seal failure or lead to spoilage.
- After the water bath, taste the brine and adjust the sugar or water content to your preference before processing.
- Once canned and sealed, when you’re ready to serve your Giardiniera, drizzle it generously with a good quality olive oil to achieve that desired richness and flavor, just before eating. Processing time for a 10-minute water bath is typically sufficient for acidified vegetables like Giardiniera. Always consult reliable canning resources for precise guidelines and safety protocols.
While white wine vinegar is recommended for its balanced flavor, you can experiment with other vinegars. Distilled white vinegar will yield a sharper, more acidic flavor. Apple cider vinegar can provide a fruitier, slightly sweeter profile, but ensure it has at least 5% acidity for safe pickling. Avoid balsamic vinegar or red wine vinegar, as their strong flavors and dark colors would drastically change the traditional taste and appearance of Giardiniera.
Adjusting the spice level is easy! For a milder Giardiniera, reduce or omit the fresh cayenne peppers and crushed red pepper flakes. For extra heat, increase the amount of cayenne peppers, add a few more red pepper flakes, or even include some thinly sliced jalapeños or serrano peppers. Remember to taste the brine and adjust to your preference before pouring it over the vegetables.
Storage Best Practices: Keeping Your Giardiniera Fresh
- Homemade Giardiniera, when properly stored in an airtight container in the refrigerator, will maintain its exceptional flavor and crisp texture for up to 30 days. Always ensure the vegetables remain submerged in the brine and oil mixture to prevent spoilage and maintain quality.
- For optimal freshness and to prevent cross-contamination, always use a clean utensil when serving your Giardiniera.
Delicious Pairings: What to Serve with Giardiniera
Giardiniera’s versatility makes it an incredible accompaniment to a wide variety of dishes. Here are some inspired serving suggestions to get you started:
- Classic Burgers: A spoonful adds a tangy, crunchy counterpoint to rich burgers like these Grilled Burgers with Bacon Tomato Jam and Smoked Gouda.
- Healthy Salads: Stir into a hearty Curried Tofu Salad for an unexpected textural and flavor boost.
- Seafood Sandwiches: Elevate a Shrimp Burgers with Jalapeno Remoulade with a bright, briny topping.
- Italian Beef Sandwiches: This is its true Chicago home! Pile it high on thinly sliced roast beef for an authentic experience.
- Grilled Sausages and Hot Dogs: A fantastic alternative to traditional relishes, offering more depth and spice.
- Eggs and Omelets: Chop finely and mix into your morning eggs for a zesty breakfast.
- Pizza and Flatbreads: A surprising but delicious topping, especially on a robust meat pizza.
- Roast Pork or Chicken: The acidity cuts through rich meats beautifully, acting as a natural palate cleanser.
- Cheese Boards: Pair with sharp aged cheeses, fresh mozzarella, or creamy goat cheese for a delightful contrast.
Explore More Great Pickled Vegetable Recipes!
If you enjoy the craft of pickling and the burst of flavor it brings, be sure to explore these other fantastic recipes from From A Chef’s Kitchen:
- Pickled Cherry Tomatoes: A sweet and tangy delight perfect for salads or snacks.
- Pickled Ramps Recipe: Capture the unique, garlicky flavor of these seasonal wild onions.
- Quick Pickled Brussels Sprouts with Jalapeno: A spicy and crunchy side that’s surprisingly delicious.
- Quick Pickled Beets with Dill: Earthy and vibrant, with a fresh herbaceous note.
- Pickled Asparagus: Crisp and zesty, a perfect seasonal treat.
Find all my pickle and relish recipes and much more culinary inspiration at: Pickle and Relish Recipes – From A Chef’s Kitchen
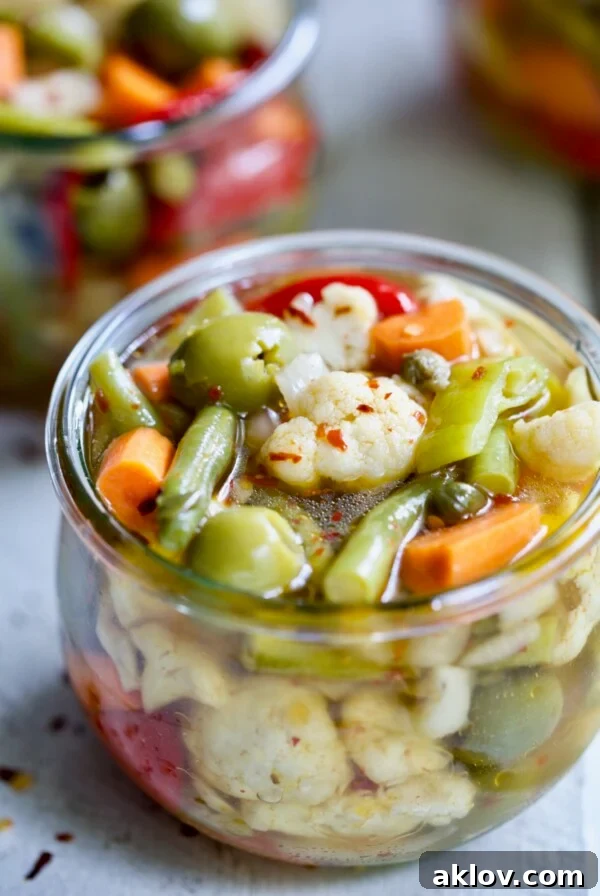
5 from 3 votes
Giardiniera (Italian Pickled Vegetables)
Giardiniera, also known as Italian Pickled Vegetables, is a classic condiment that you can easily make yourself and the flavor is so much better than store-bought. It’s a great way to preserve vegetables for later use and is perfect on sandwiches and burgers, on an antipasto platter, as a ready-made side dish or as a healthful snack!
Equipment
- Wusthof Chef Knife
- Cutting Board
- Saucepan
- Gallon Glass Jars
Ingredients
- 4 cups water
- 2 cups white wine vinegar (one 16-ounce bottle)
- 1/3 cup sugar
- 12 cloves garlic, smashed
- 4 small fresh bay leaves, or 2 dried
- 2 sprigs fresh thyme
- 2 sprigs fresh rosemary
- 1 tablespoon black peppercorns
- 1 tablespoon mustard seeds, brown or yellow
- 1 teaspoon celery seed
- 1 teaspoon fennel seed
- 2 1/2 tablespoons pickling or kosher salt, or to taste
- 2 cayenne peppers, fresh or dried or 1 tablespoon crushed red pepper flakes
- 1/2 small head of cauliflower, cut into florets (approximately 2 heaping cups)
- 3 large carrots, halved and sliced into similar-sized pieces
- 1/2 medium onion, coarsely chopped
- 1 medium red bell pepper, seeds and membranes removed, sliced
- 2 cups green beans, ends trimmed and halved crosswise
- 1 cup green olives, such as Sicilian or Castelvestrano
- 1/2 cup pepperoncini peppers, seeded and sliced
- 1 tablespoon drained capers
- 1/2 cup olive oil
Instructions
- Combine the first 12 ingredients (water through salt) in a saucepan and bring to a boil. Reduce heat to medium and let it simmer away for 5 minutes. Remove from heat, cover and let stand 30 minutes.
- Place the cayenne peppers (or crushed red pepper flakes), cauliflower, carrots, onion, red bell pepper, green beans, olives, pepperoncini and capers in a large glass jar.
- Strain the brine, return it to the saucepan and briefly bring to a simmer.
- Carefully and slowly pour the hot brine over the vegetables, pushing the vegetables under the surface of the brine.
- Let cool to room temperature. Check the vegetables periodically to make sure they’re under the surface of the brine.
- Add the olive oil, stir and refrigerate for 3 days.
- After 3 days, you can leave it in the big jar or transfer to something smaller as the vegetables will have lost some of their bulk and will take up less room.
- Keeps in the refrigerator for 30 days.
Notes
Keeps in the refrigerator for up to 30 days.
TO WATER BATH CAN:
- Start with raw vegetables.
- Leave the olive oil out.
- Taste the brine and adjust the sugar or water to taste.
- Give the giardiniera a good drizzle with a nice olive oil when you serve it.
Nutrition Information
Nutritional values are automatically calculated using unbranded products and are estimates only. Actual results may vary based on ingredients used and portion sizes. Adjust as needed for dietary restrictions, allergies, or health concerns.
- Serving: 1
- Calories: 153 kcal
- Carbohydrates: 12g
- Protein: 1g
- Fat: 11g
- Saturated Fat: 2g
- Polyunsaturated Fat: 1g
- Monounsaturated Fat: 8g
- Sodium: 1671mg
- Potassium: 190mg
- Fiber: 2g
- Sugar: 8g
- Vitamin A: 3524 IU
- Vitamin C: 22mg
- Calcium: 43mg
- Iron: 1mg
 Like this? Leave a comment below!